Learn how to integrate your BrightSide account with Airbnb, VRBO, Booking.com, and other online travel agencies (OTAs). These tutorials take you step by step through the integration process. Tutorials include video, screenshots, and descriptions.
Mailchimp
BrightSide Staff2025-03-10T16:34:01-04:00Summary
BrightSide has a robust guest letter system that includes email, SMS (texts), and channel messages (OTA integration). However, BrightSide is not a full-fledged email client. Email sent from BrightSide is limited to communications regarding a specific reservation. Marketing emails are an example of what you cannot send. In light of this, we added an integration with Mailchimp.
The advantage of connecting BrightSide to your Mailchimp account is that all guests may be automatically added to your marketing email list when they check in or check out.
NOTE: You must have a separate Mailchimp account in order for this to work. BrightSide does not provide the Mailchimp account.
In Mailchimp
In BrightSide
Step-by-Step Guide to Connect BrightSide with Mailchimp
Create an Audience in Mailchimp
In order for BrightSide to sync your guests’ information to Mailchimp, you need to create an Audience there first. Mailchimp allows you to create a contact list, and then create audiences from that list. For example, you could have a contact list that includes all your guests and an audience that includes only guests from Texas. You could have an audience that includes all your contacts. Either way, you need to Create a Mailchimp Audience.
After you create the audience for your marketing campaign, you need to enter the audience ID into BrightSide. The easiest way is to copy the ID from Mailchimp and paste it into the appropriate field in BrightSide.
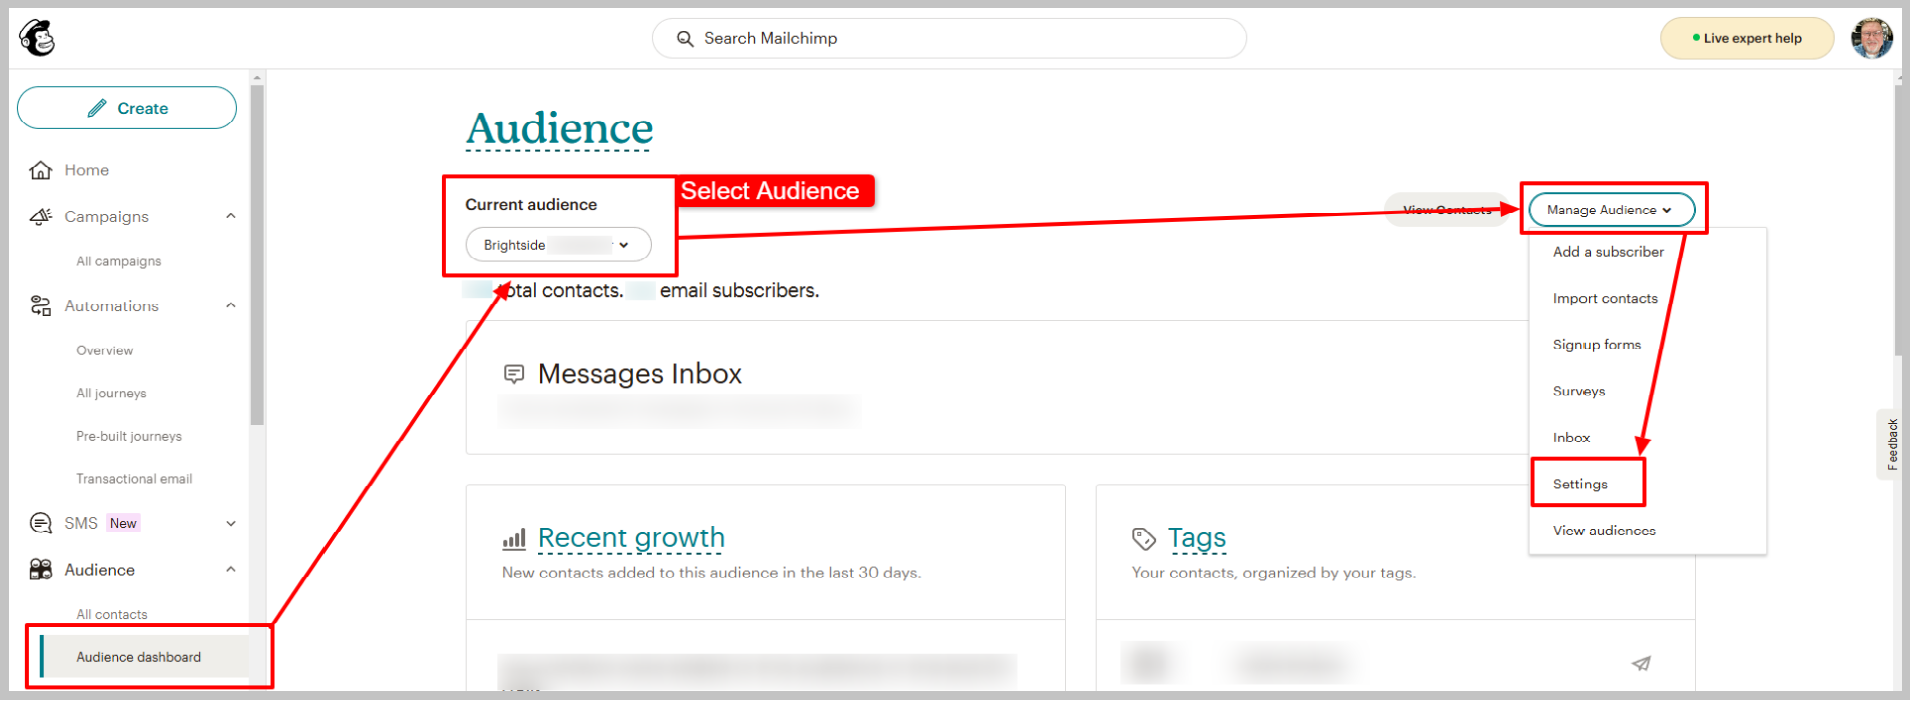
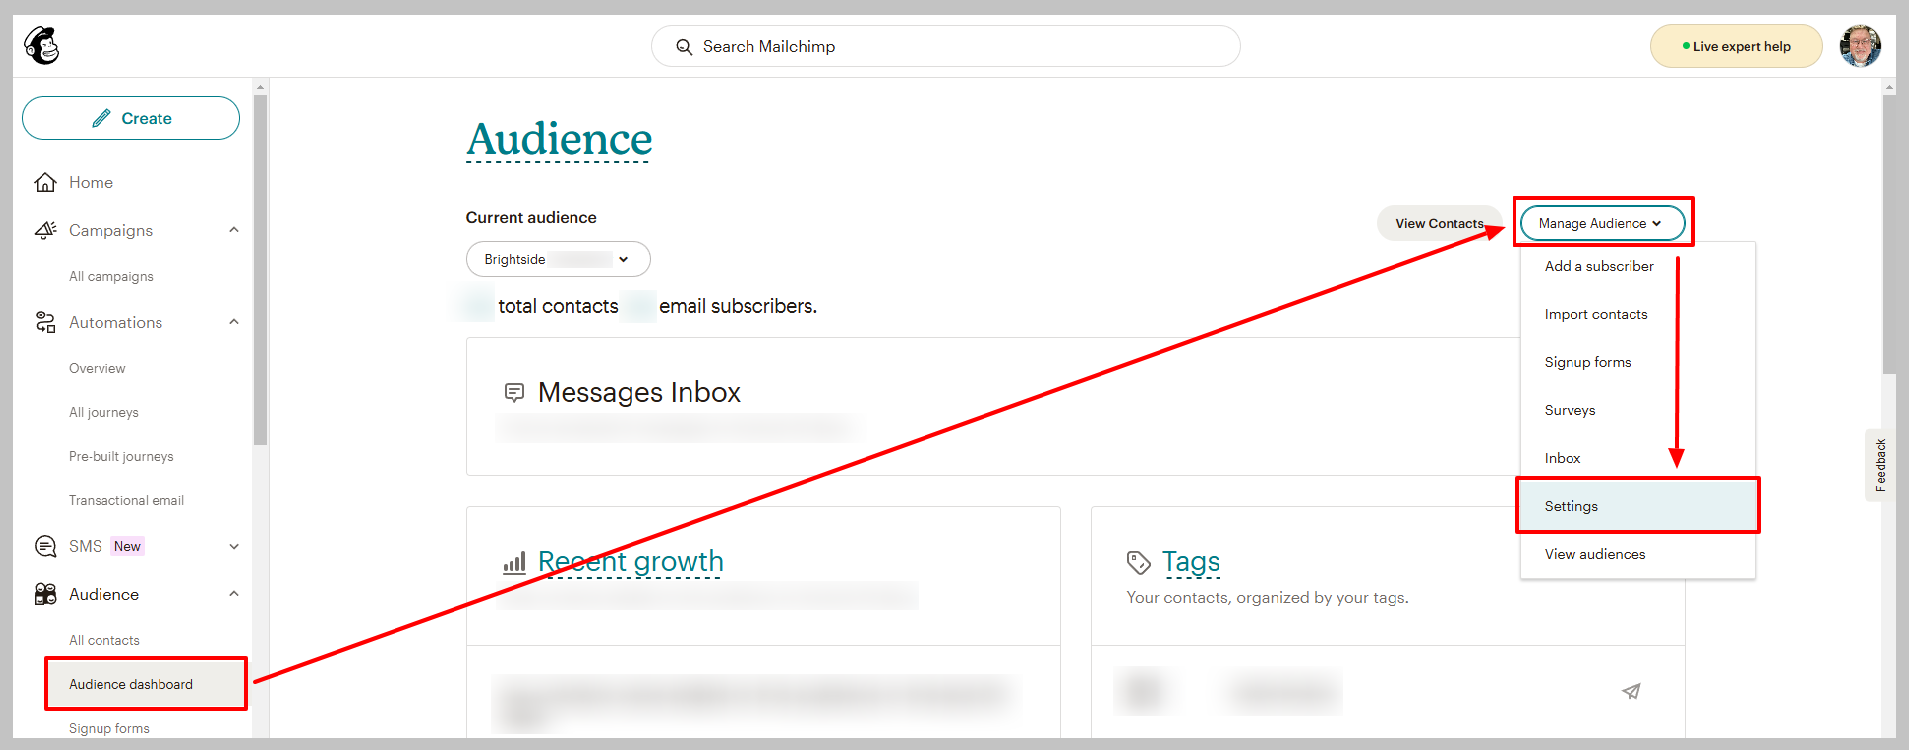
- In Mailchimp navigate to the Audience Dashboard.
- On the left hand side of the screen, click “Audience Dashboard.”
- If you have more than one Audience, make sure you are working with the correct one. It is listed under “Current Audience.”
- In the upper right hand corner of the screen, click “Manage Audience.”
- Click “Settings.”
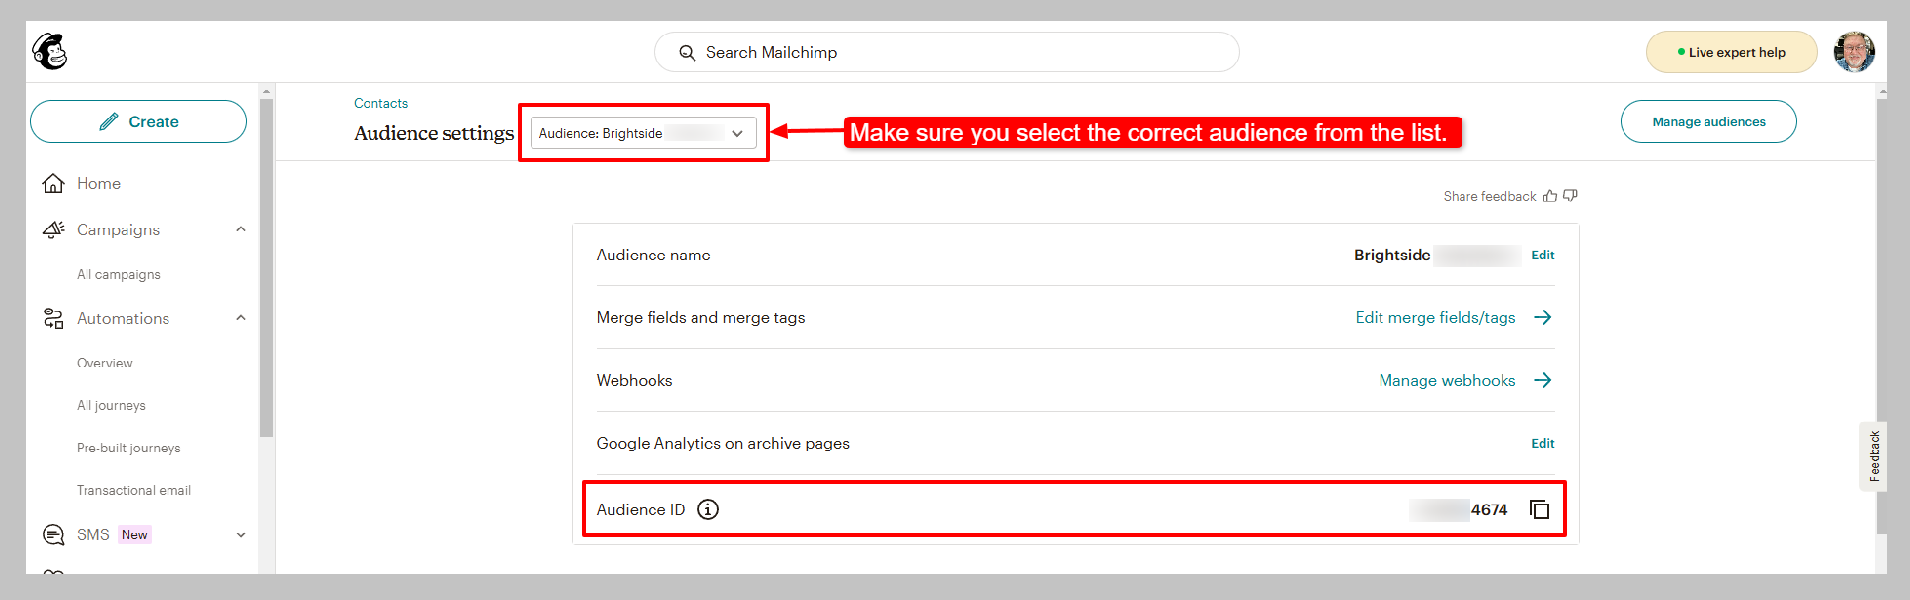
Navigate to Audience Settings
- Click the copy icon to copy the Audience ID.
- Follow the instructions in BrightSide Settings to paste it into BrightSide.
Copy Audience ID
Create an API Key in Mailchimp
- In Mailchimp, navigate to the API Keys Section:
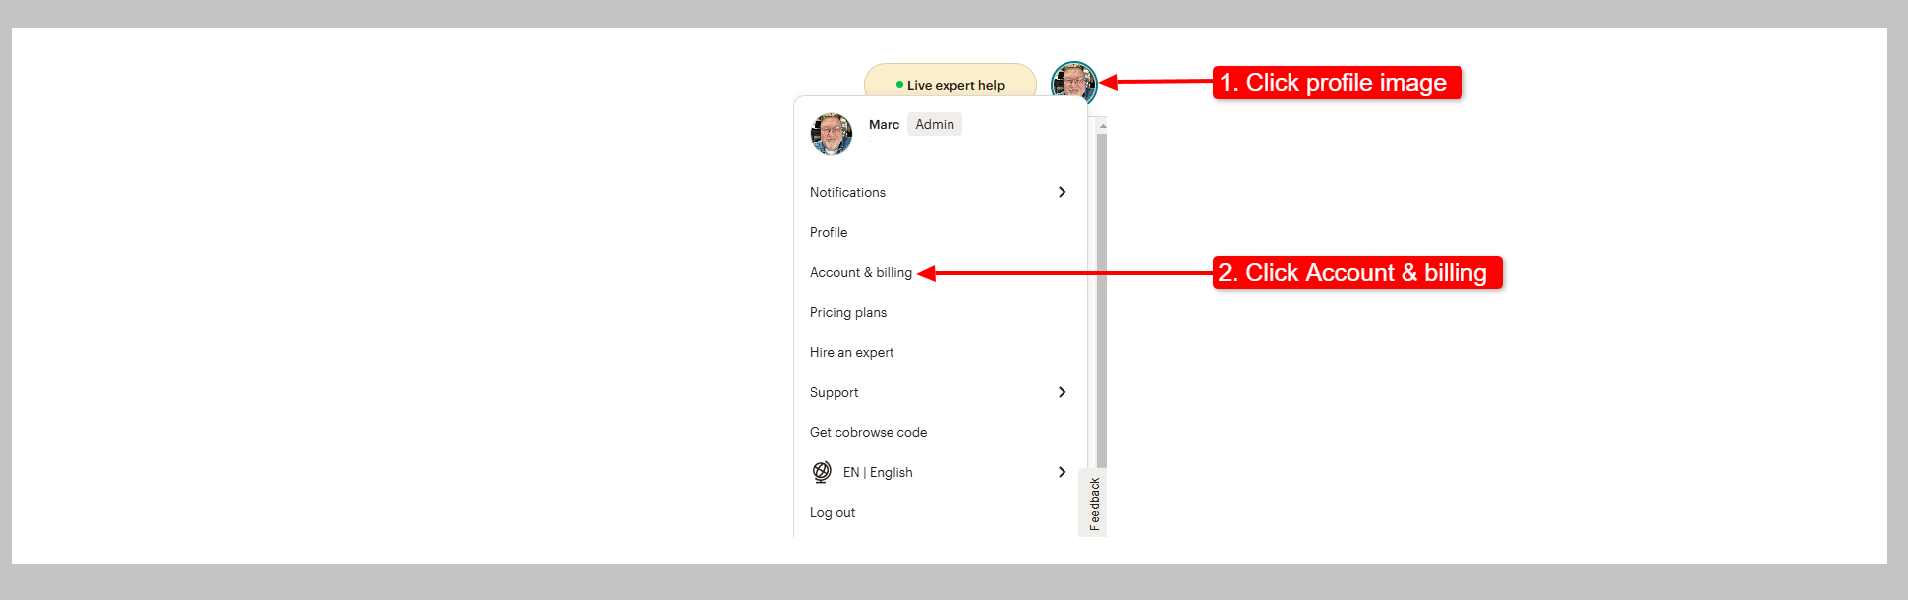
- Click on your profile icon at the top right corner of the screen.
- From the dropdown menu, select ‘Account & billing.’
NOTE: The API key allows BrightSide to access your Mailchimp account directly. Without it we cannot communicate with, or transfer information to your account.
Navigate to Mailchimp API Settings
- In the Account menu, click on ‘Extras’ and then choose ‘API keys.’

API Keys
- Create a New API Key:
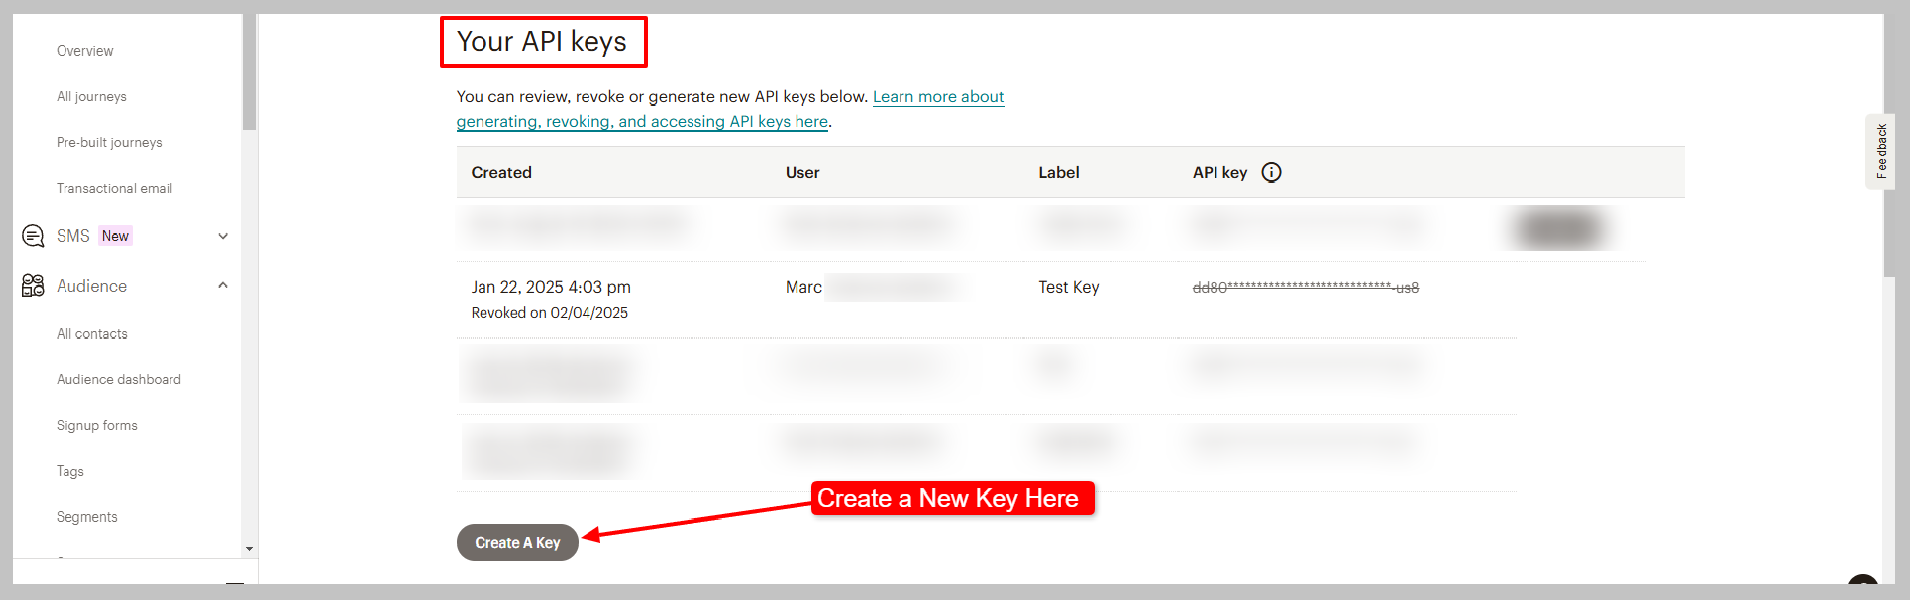
- Scroll down to the “Your API keys” section.
- Click on the button labeled “Create A Key.”
- Label Your API Key:
- Give your new API key a descriptive name (e.g., “BrightSide Integration”) to easily identify its purpose later. (You’ll only be able to see the full API Key immediately after you generate it. After that, you won’t see the actual key, only the name you’ve given it.)
- Click “Generate Key.”
- Copy the API Key:
- After the key is generated, you’ll see it listed under “Your API keys.”
- Click on the “Copy” icon next to your new API key to copy it to your clipboard.
Create a New API Key
IMPORTANT: Copy the API key and paste it somewhere for safekeeping. If you fail to copy and save the key, you will need to generate a new one. The key is not accessible after you navigate away!
Create Merge Fields in Mailchimp
Navigate to: Audience Dashboard > Manage Audience > Settings > Audience Fields and Merge Tags
Navigate to Audience Merge Fields
- On the resulting page, click “Edit Audience Fields.”
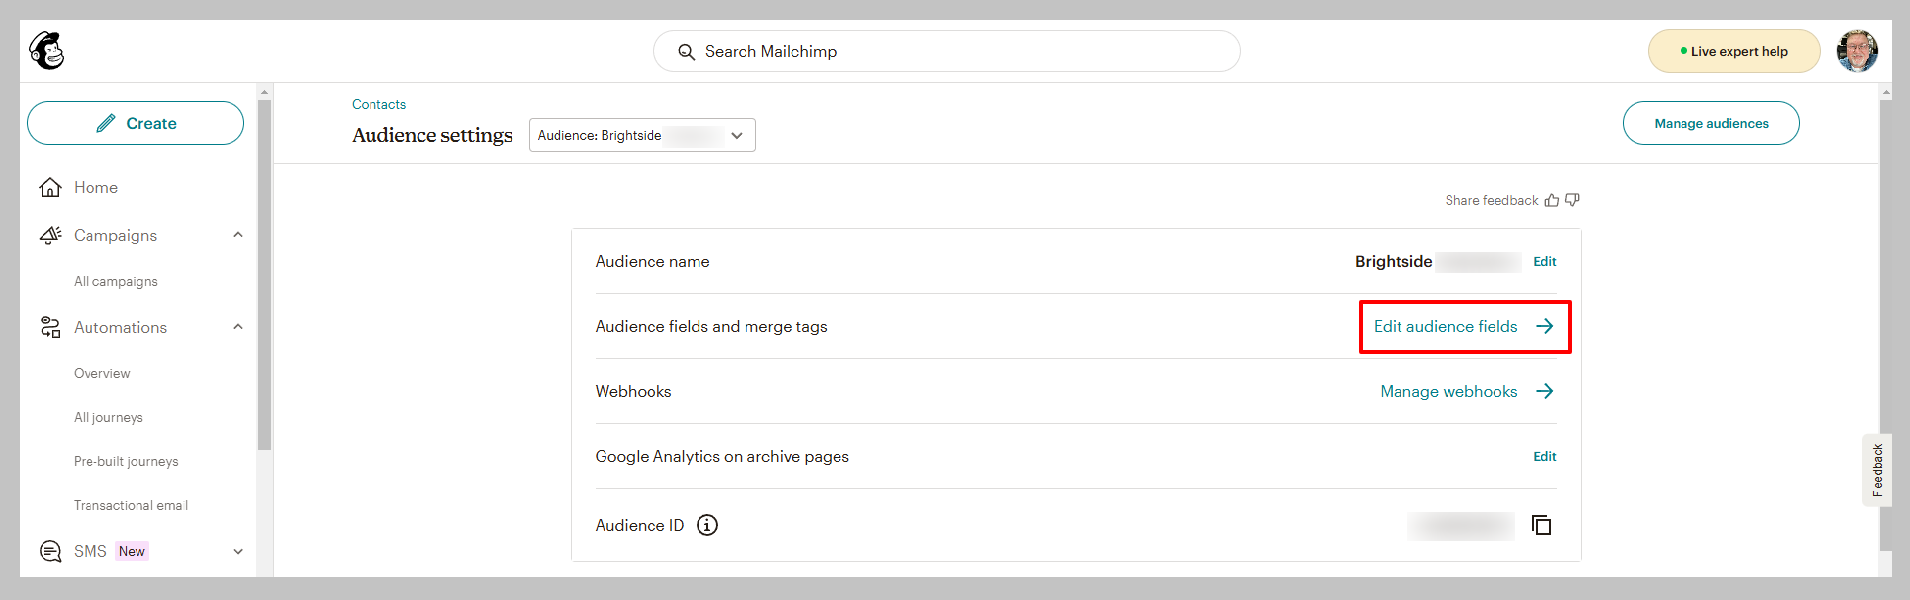
Edit Audience Fields
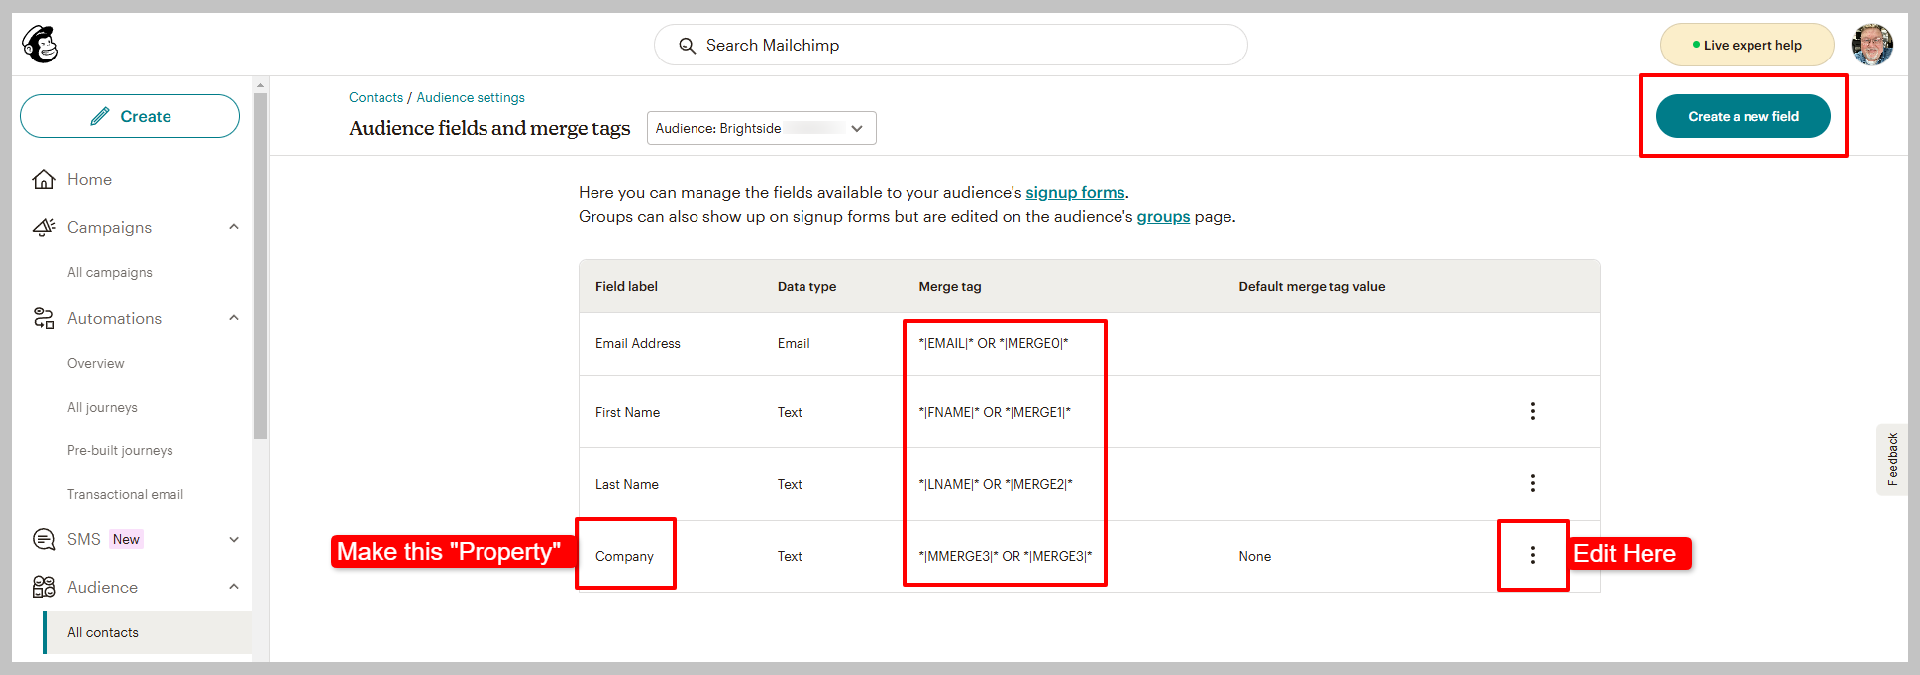
Follow the instructions in Mailchimp to create merge fields. The following four fields are the only fields you need for this integration.
- The “Email Address” is a default field and is not editable.
- Add First Name.
- Add Last Name.
- Add Property Name (in the example, we have “Company” as a field, but use “Property” instead).
After you create these fields, copy and paste the merge tags into the corresponding fields in BrightSide.
Create New Merge Fields
Create a Journey in Mailchimp (optional, but highly recommended)
Navigate to: Automations > All Journeys
A Mailchimp “Journey” is an automated email campaign. You can set up a journey so your guests will receive marketing emails after they check out. The settings allow you to create a number of email templates, and schedule them to go out at predetermined times. Since this is all done on Mailchimp’s end, please check Mailchimp’s instructions on how to create a Journey.
If you created a Journey, you need to enter the event name in BrightSide. A great example of this would be “At Check Out.” You could set up a journey that automatically begins when the guest checks out. The first email could be a request for a review two days after check out. The next would be a reminder to book their return vacation with a discount code to encourage them to book now…and so on.
NOTE: You do not have to create a Journey. If you don’t, the guests will still be added to your specified Audience, but you need to manually create emails to send to guests in your audience. The automation part is limited without the Journey.
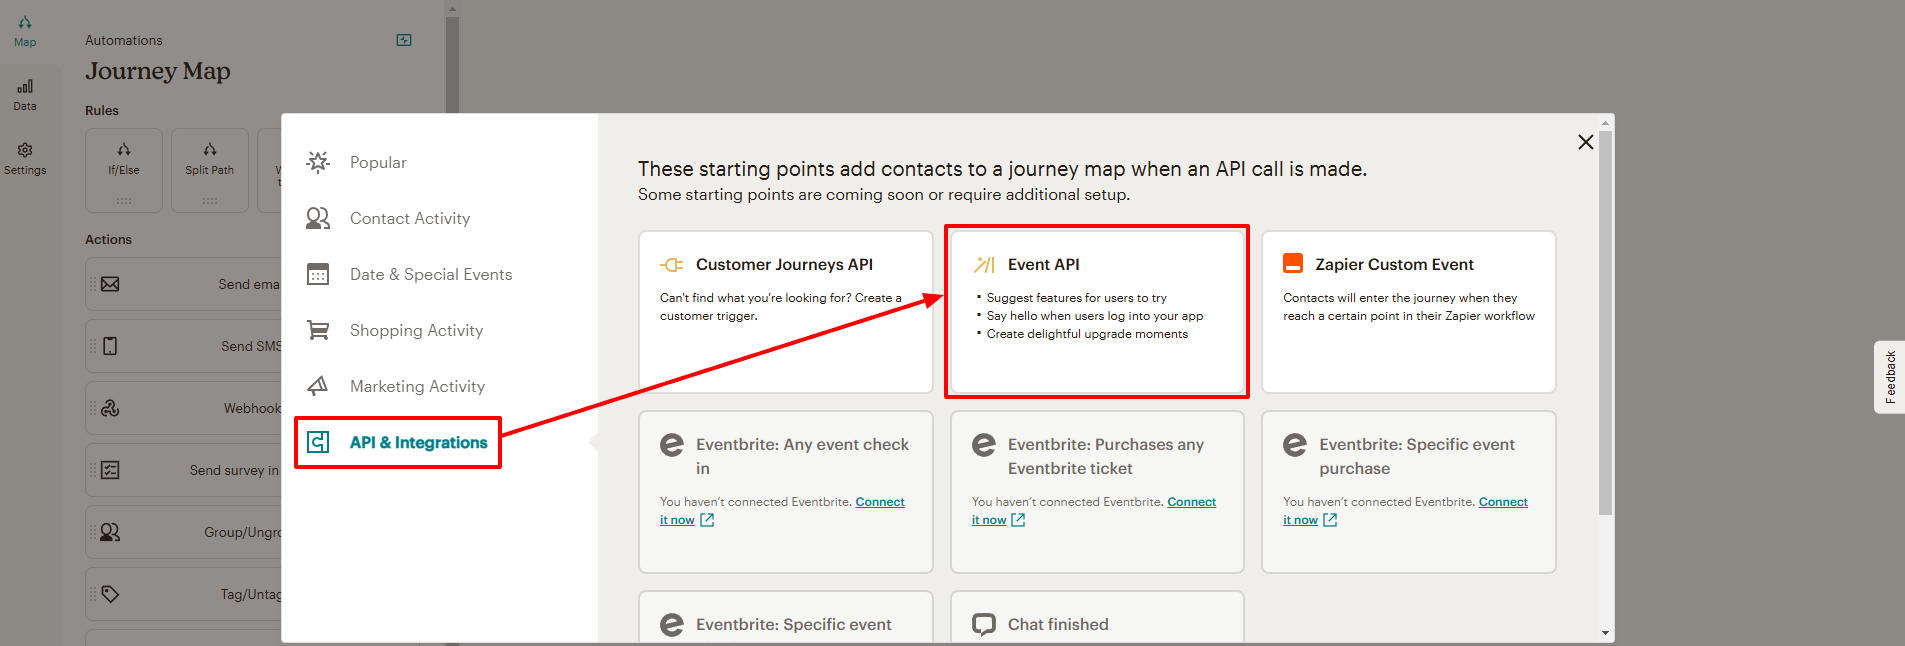
Create Events
When you create your Journey in Mailchimp, you need to add at least one “event” that triggers the guests journey from BrightSide. For example, if you want to begin your marketing campaign to them when they check in, create a check in event. Follow the instructions in Mailchimp to add the event, then add the event name to BrightSide.
Customer Journey Event
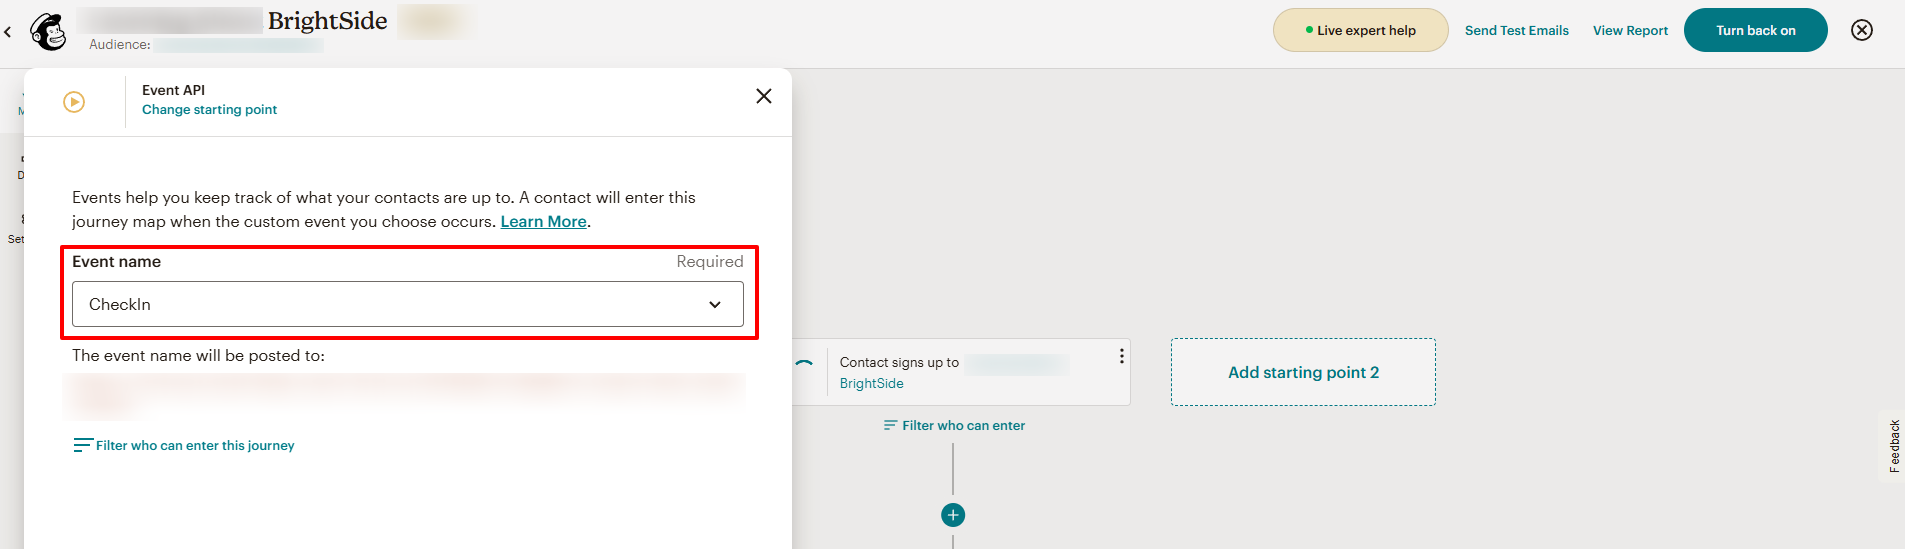
Event Name | CheckIn
NOTE: After you create the event in Mailchimp, you need to add it to your BrightSide integration.
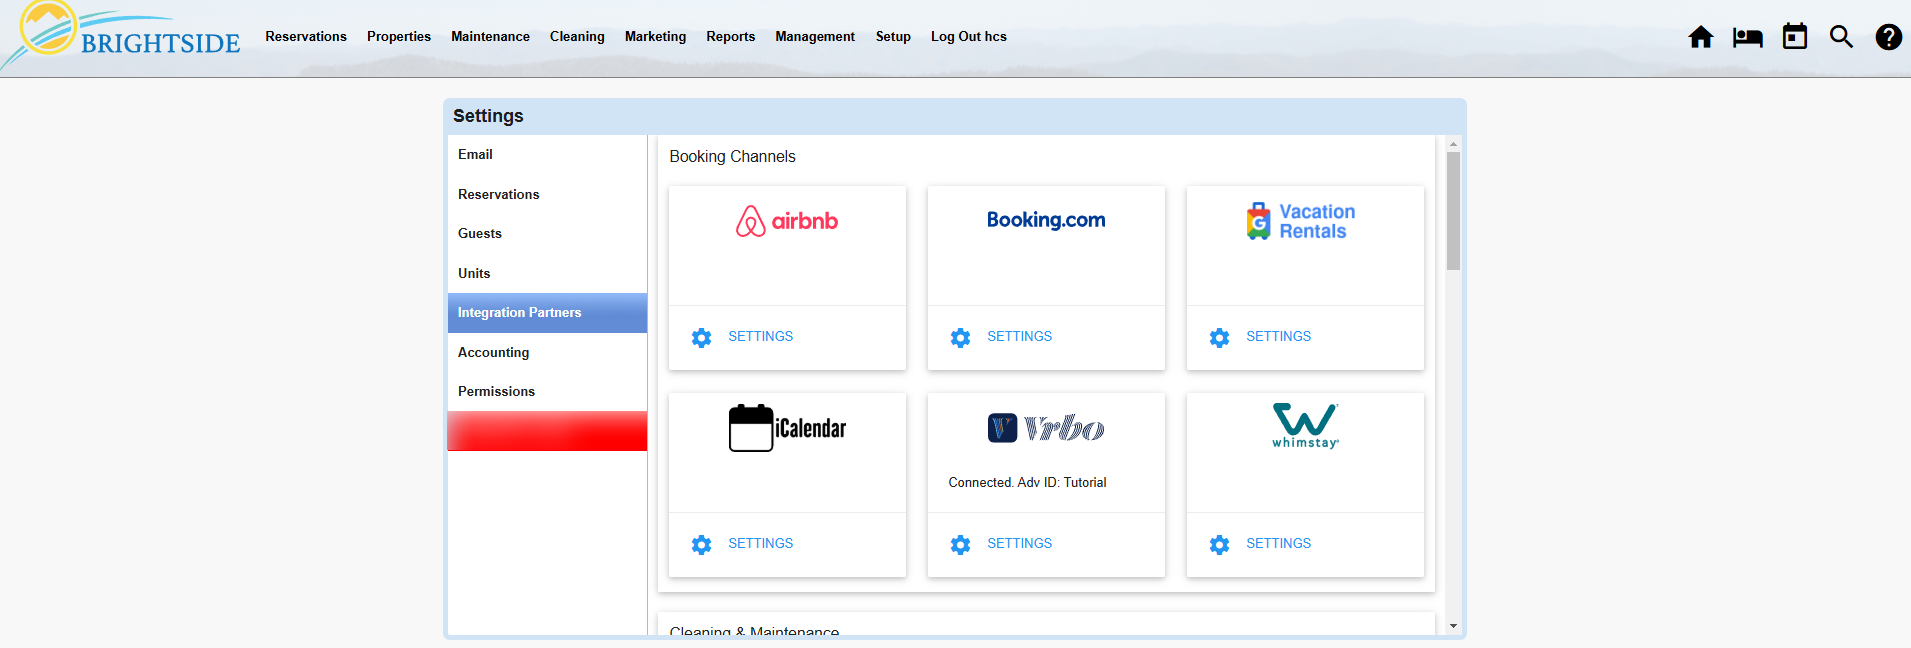
BrightSide Settings
Navigate to: Setup > Settings > Integration Partners > Mailchimp Settings

Mailchimp Integration
Audience ID
You must create the Audience ID in Mailchimp, then copy and paste it into BrightSide following the instructions below.
- Click the Mailchimp Settings image to open the popup window shown below.
- Paste the Audience ID from Mailchimp into the List ID.
- Save.
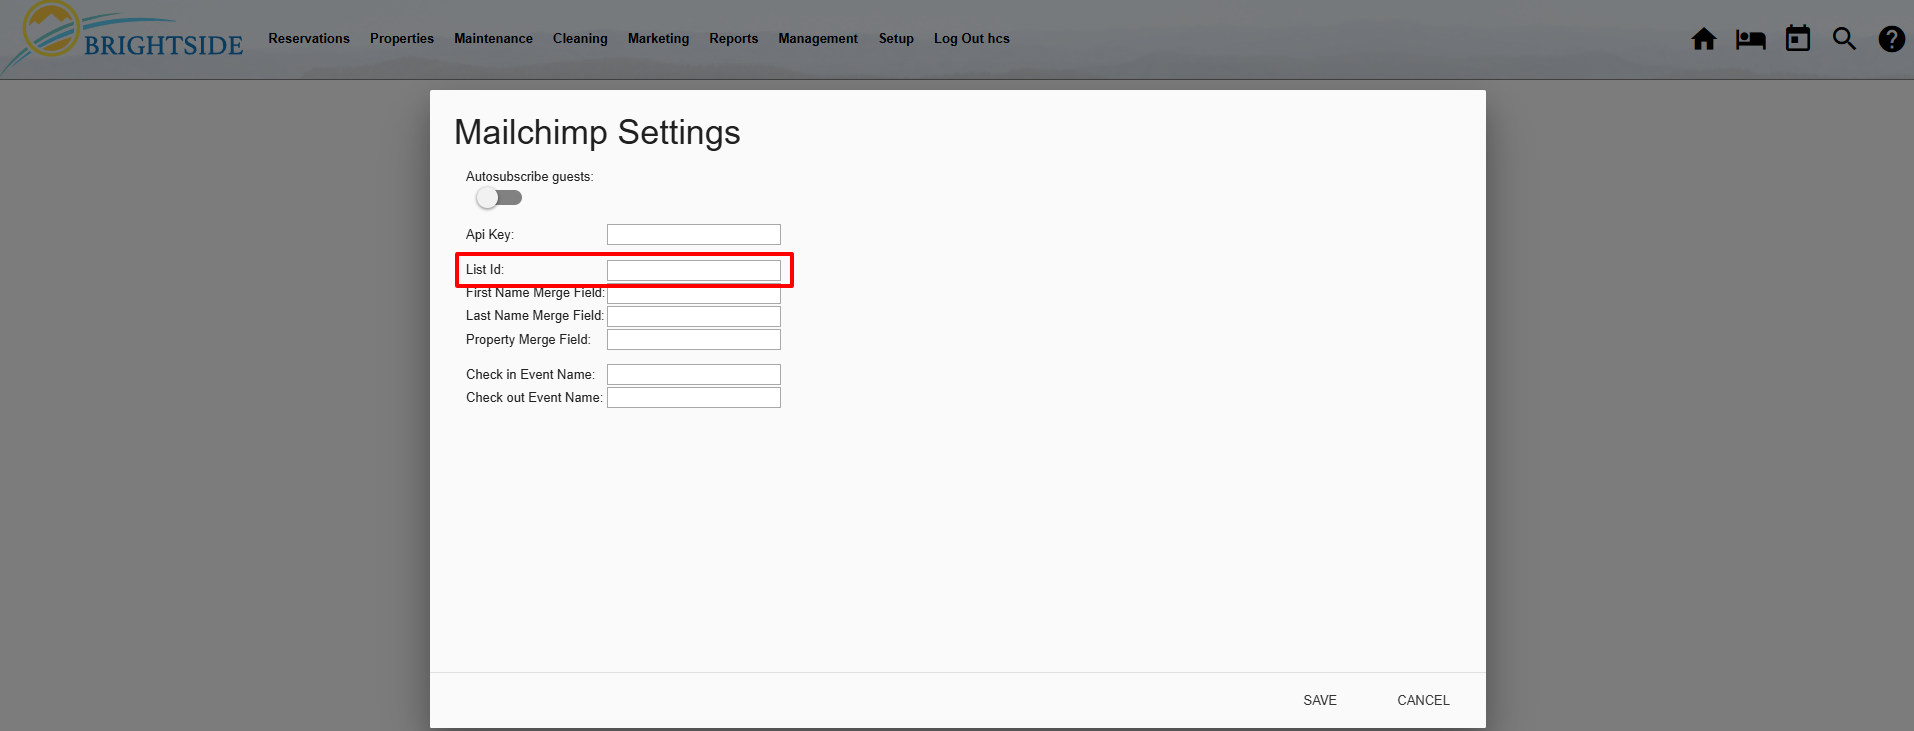
Paste Audience ID in BrightSide
Add the API Key to BrightSide
You must create the API Key in Mailchimp, then copy and paste it into BrightSide following the instructions below.
- Click the Mailchimp Settings image to open the popup window shown below.
- Copy the API key from Mailchimp and paste it into the API Key field. This is the API key you created in Mailchimp and carefully copied and saved.
- Save.
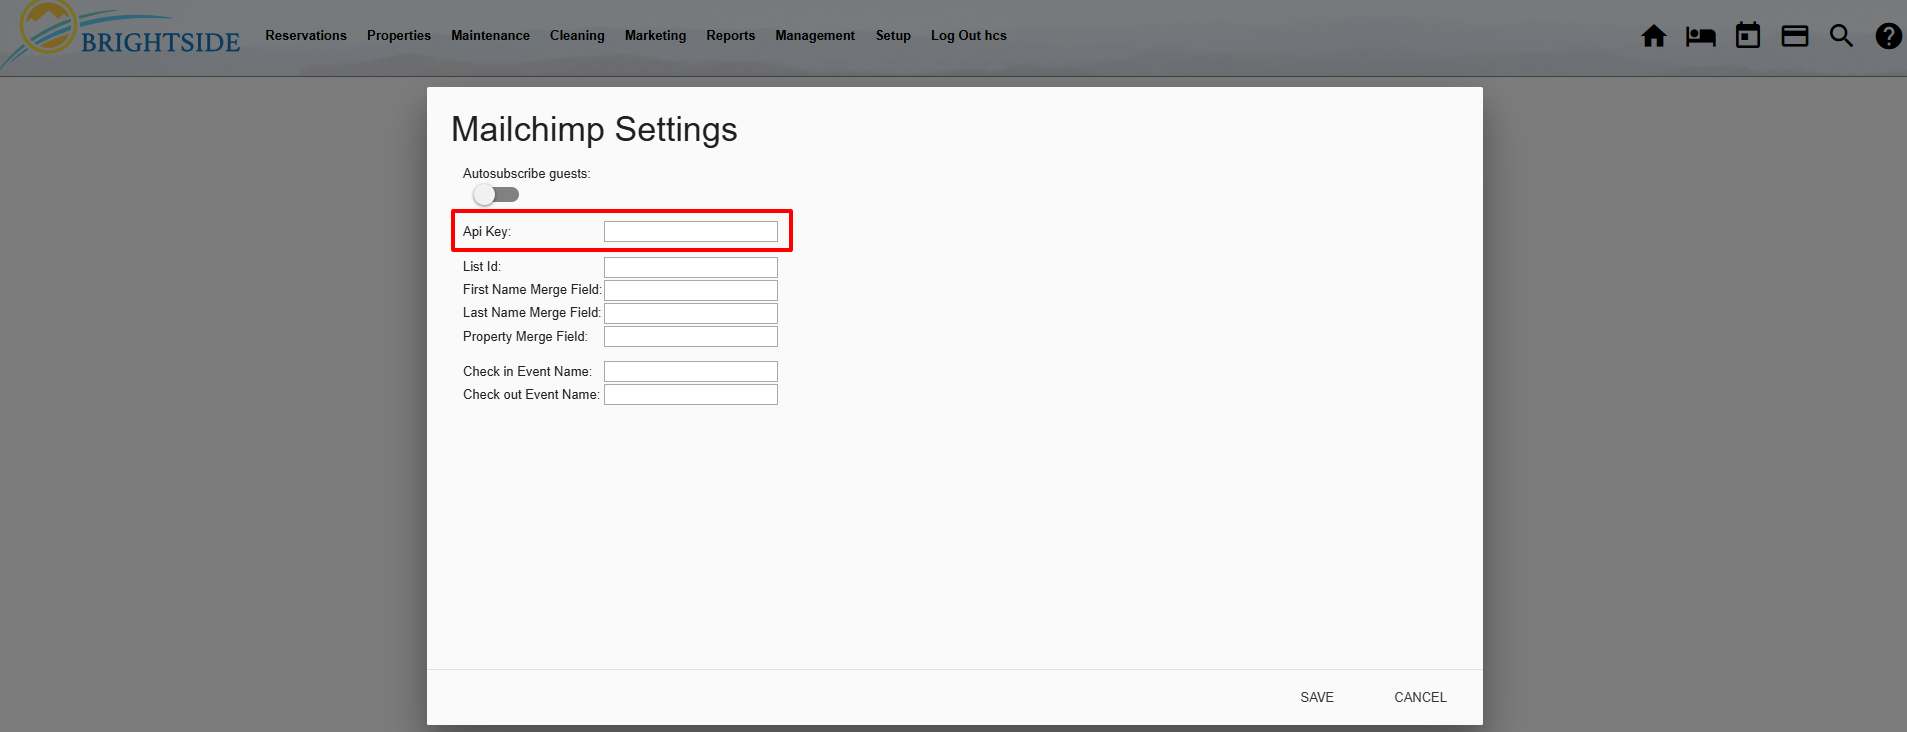
Enter Mailchimp API Key
Add the Merge Fields to BrightSide
You must create the Merge Fields in Mailchimp, then copy and paste it into BrightSide following the instructions below.
- Click the Mailchimp Settings image to open the popup window shown below.
- Type the merge field names from Mailchimp into the corresponding fields.
- Save.

Add Merge Fields in BrightSide
Add Events to BrightSide
You must create the Events in Mailchimp, then copy and paste it into BrightSide following the instructions below.
- Click the Mailchimp Settings image to open the popup window shown below.
- Type the Event names from Mailchimp into the corresponding fields.
- Save.
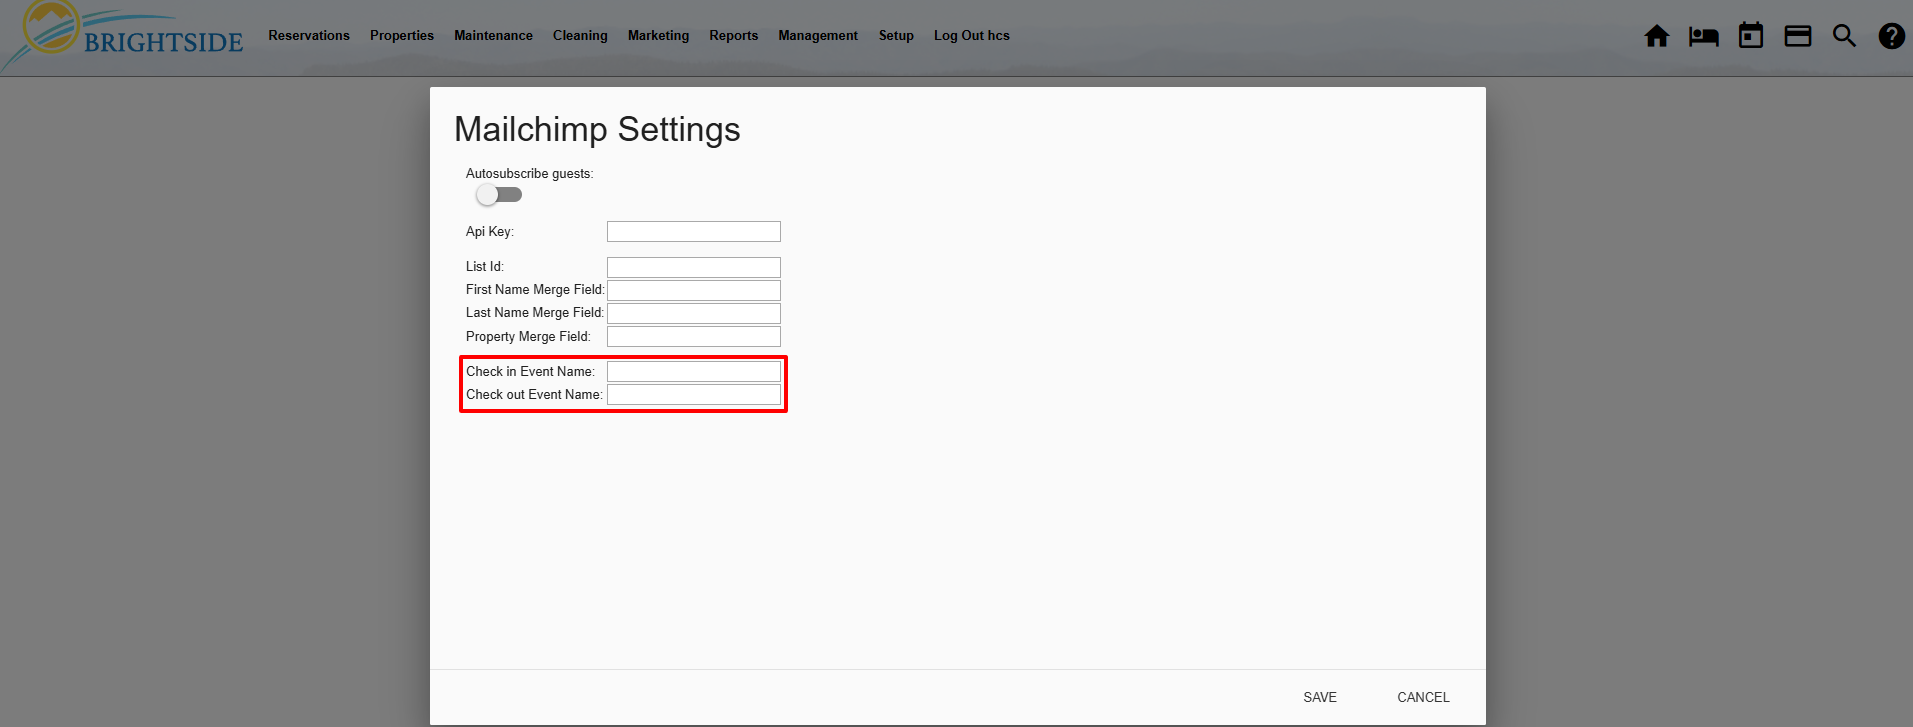
Enter Event Names in BrightSide
Turn on Autosubscribe Guests
When you have completed all the steps above in both Mailchimp and BrightSide, toggle on “Autosubscribe Guests.”
- Click the Mailchimp Settings image to open the popup window shown below.
- Toggle the gray circle so it turns blue to activate it.
- Save.
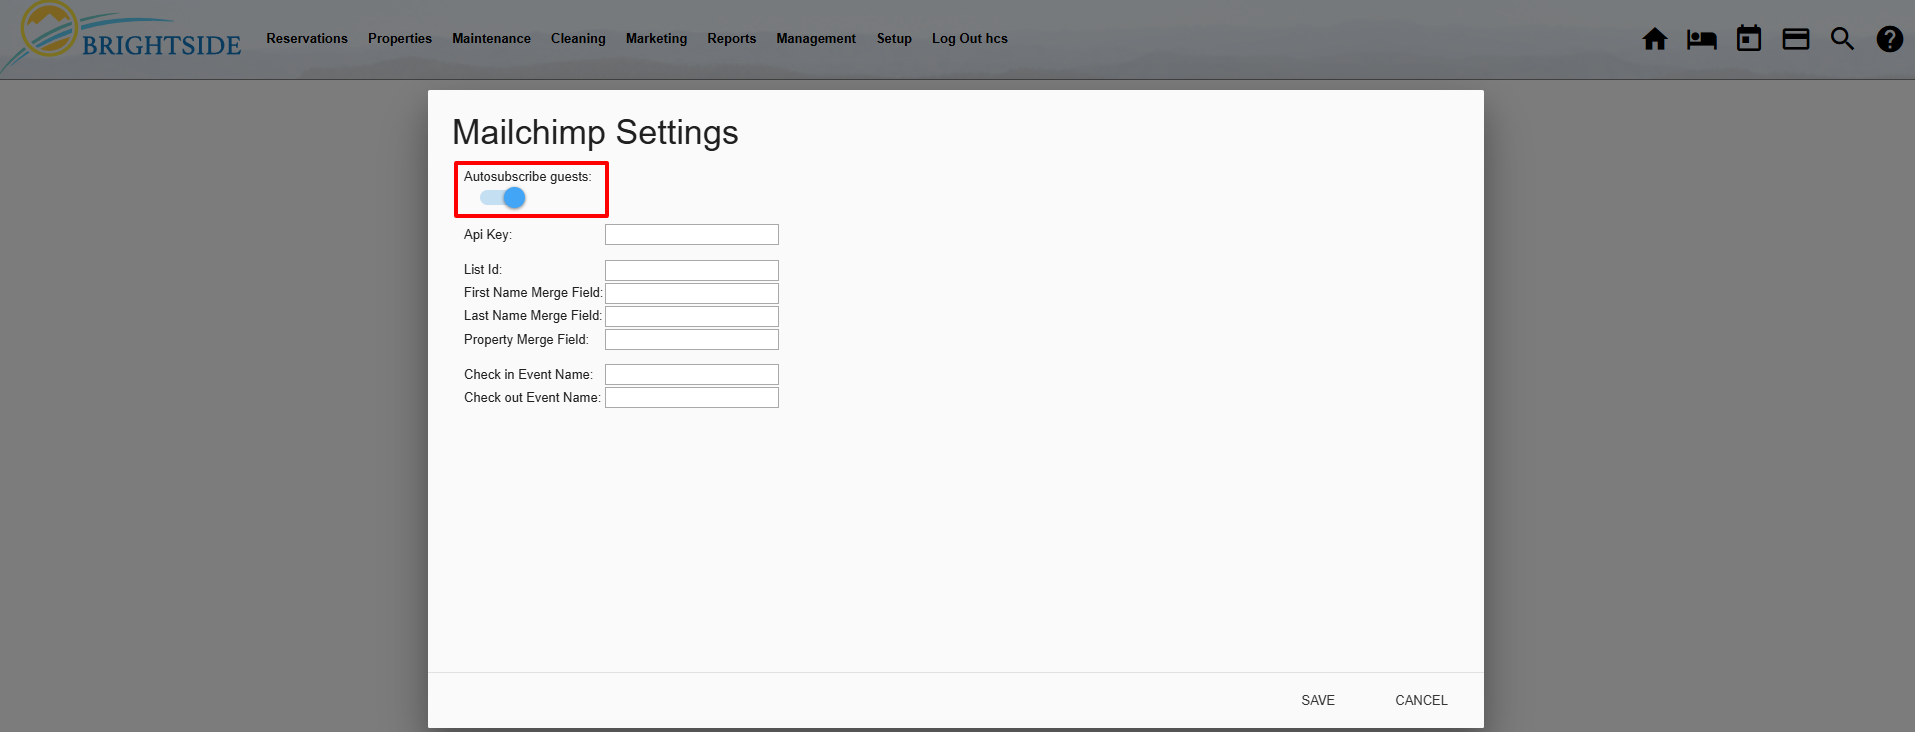
Autosubscribe Guests
Congratulations! You have completed the Mailchimp integration setup. Now your guests will automatically be added to your Mailchimp Audience and begin receiving marketing emails according to your Journey settings.