Summary
Millions of people rely on Google Reviews every day to determine where they shop, eat, play, or do just about anything and everything. The opinions of those who went before them are important. One of the most visible resources for getting those opinions is Google Reviews. In this article, we explain how you can set up BrightSide to automatically import new Google Reviews where you can respond to the reviews and possibly display them on your website.
First Things First
Google Business Profile
Make sure your company has a Google Business Profile, formerly known as Google My Business. If you don’t yet have a Google Business Profile, you must do that first. BrightSide cannot connect to a nonexistent account, or a business profile you don’t have control over. After Google approves you as the owner of your business profile, we can begin the process of connecting BrightSide to it.
Your Google Business Profile is where you manage your company’s information on Google. You can list your business hours, products, address, phone number, and respond to customer reviews left on their platform. Be sure to keep a record of the email address associated with this account and the password. You will need them.
Google Workspace
Companies utilizing Google Workspace need to provide permission to manage the profile in the Google admin dashboard. Without this permission, we will not be able to connect your BrightSide account.
- Log into your Google Workspace account at https:/admin.google.com.
- Go to Apps > Additional Google Services
- Enable “Google Business Profile Manager”
Connecting to Google Reviews
Contact BrightSide Support
Navigate to: Setup > Settings > Integration Partners > Google Reviews (tab)
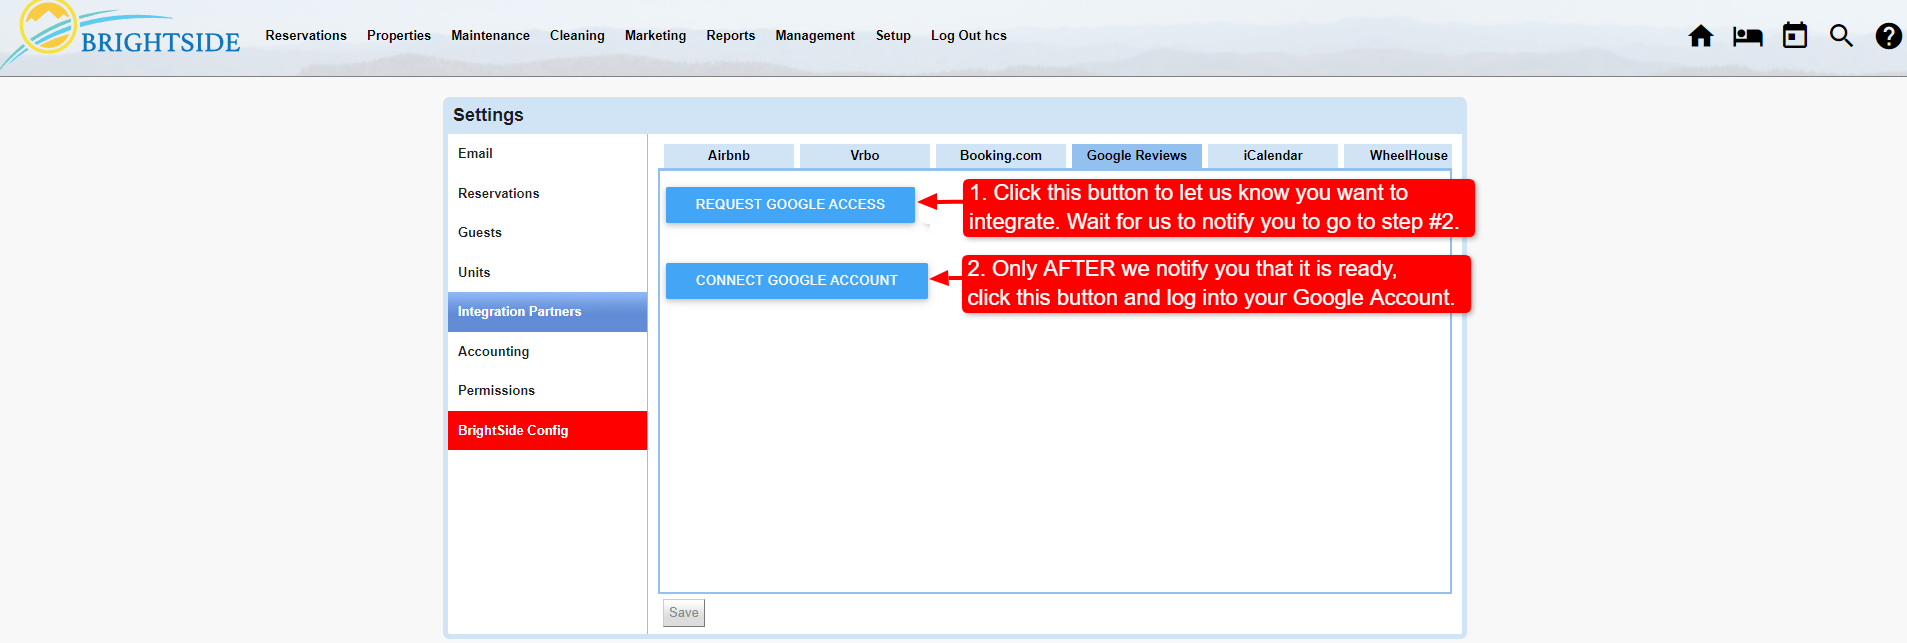
After you have access to your Google Business Profile, return to BrightSide and notify us that you want to integrate with Google Reviews. This is the first step. Under the Google Reviews tab, click on the blue button REQUEST GOOGLE ACCESS.
This will send support an email, notifying us that you are ready to connect. We will perform a couple of tasks in the backend and then notify you by email that you may go on to step two below.
Begin the Process
Click on Image for Enlarged View
Connect Your Google Account
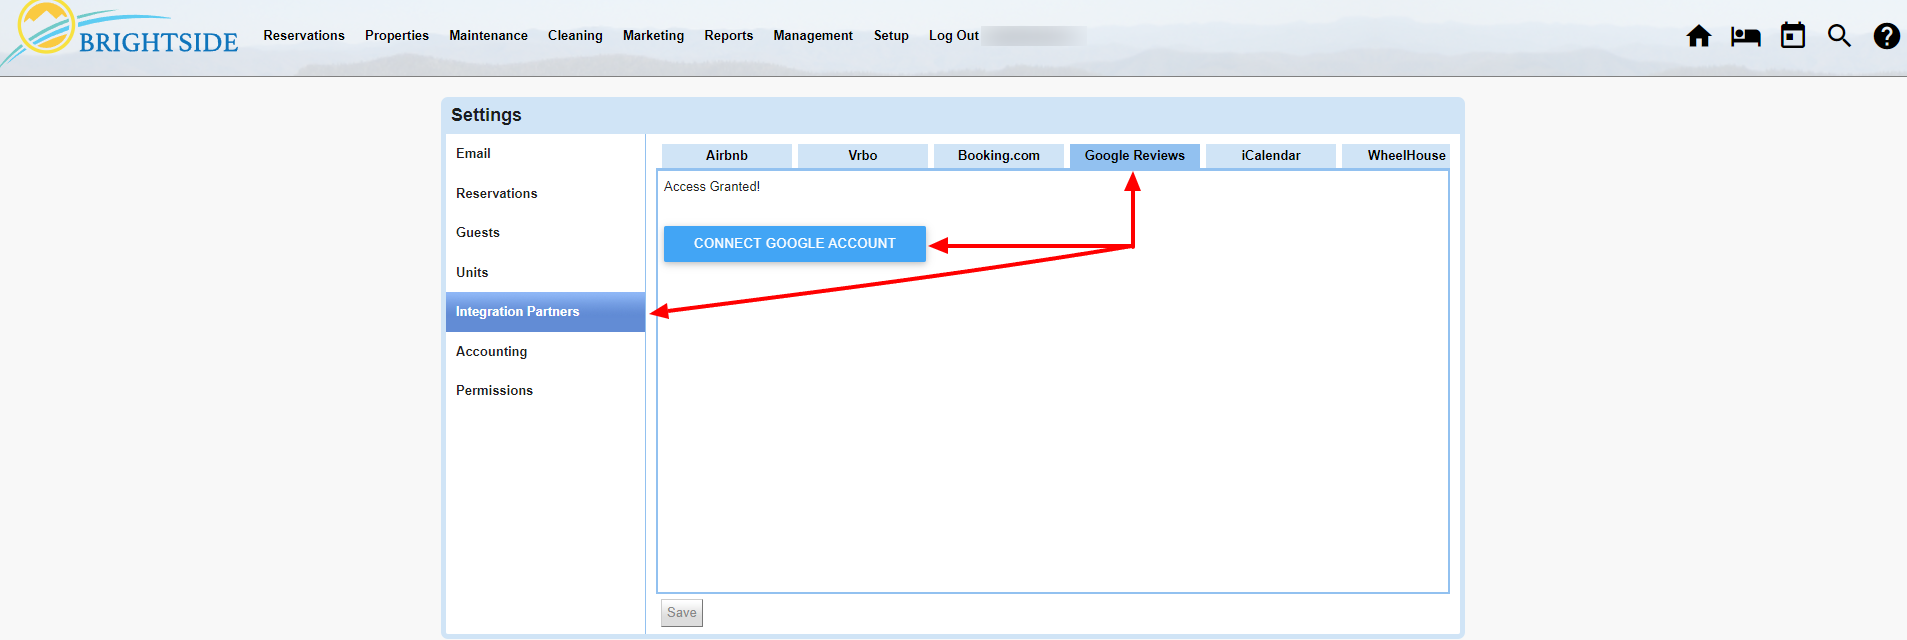
When BrightSide support confirms that we have completed step one, go to the Google Reviews tab in Integration Partners to finish the integration. All you need to do is click on the blue button that reads, CONNECT GOOGLE ACCOUNT. This will take you to Google, where you must log in using the credentials for the account used to manage your Google Business Profile. After you log in, you will be redirected back to BrightSide.
NOTE: If you have more than one Google account, make sure you are not logged into an account that is not associated with your Google Business Profile. This will associate the incorrect Google account with BrightSide and you will not be able to import your reviews.
Connect Google Account
Click on Image for Enlarged View
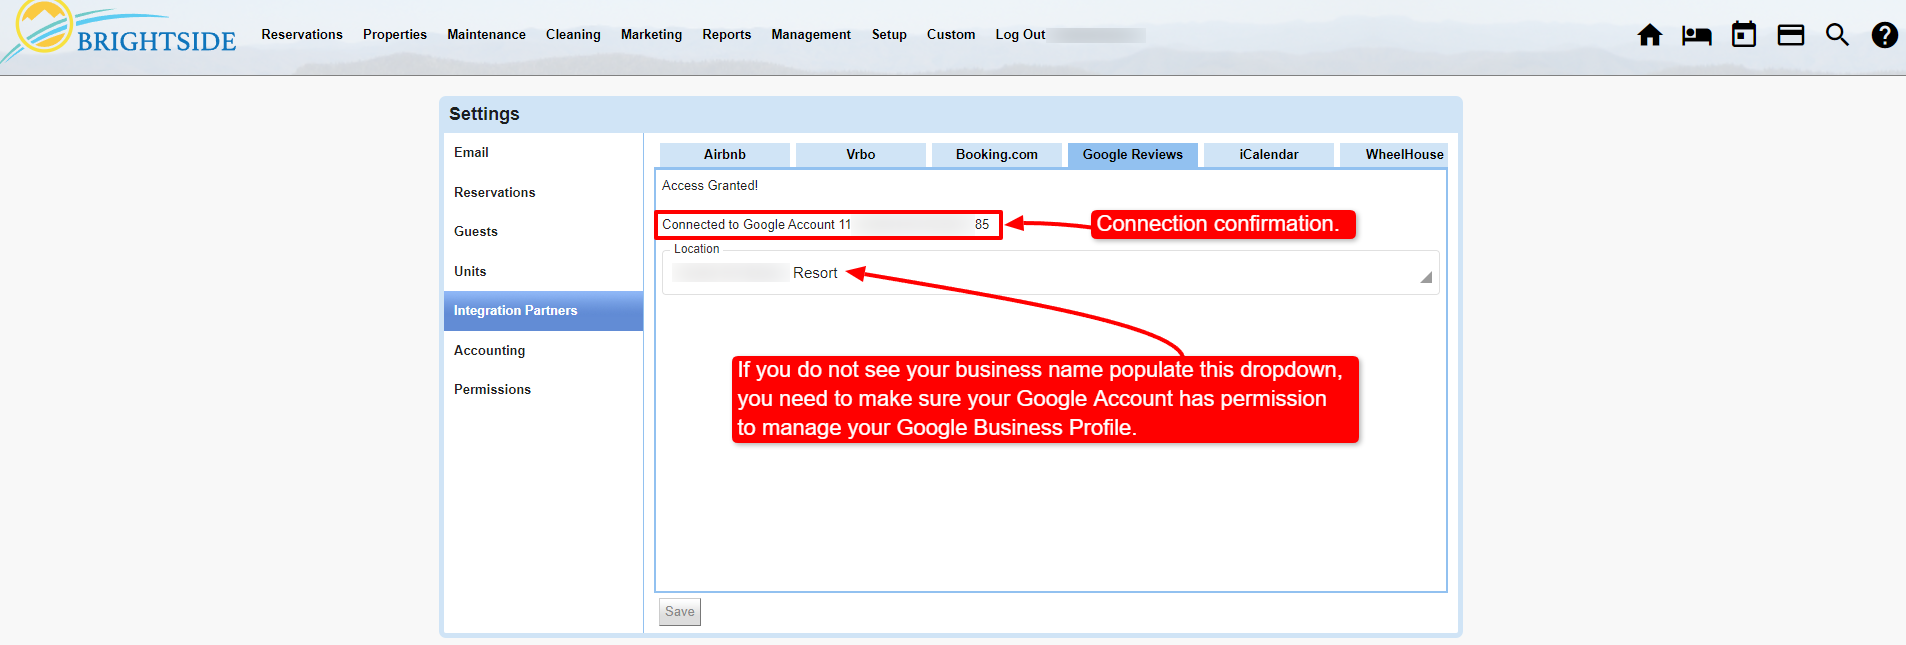
A successful connection to your Google account is indicated by the message, “Connected to Google Account ###############.” You will also see the name of your business’ Google profile in the dropdown. If you are connected and you don’t see the name of your business in the dropdown, your Google account may not have management permission over the Google Business Profile.
Google Connection Confirmed
Click on Image for Enlarged View
Accessing and Responding to Reviews
Navigate to: Marketing > Guest Comments
Importing Google Reviews
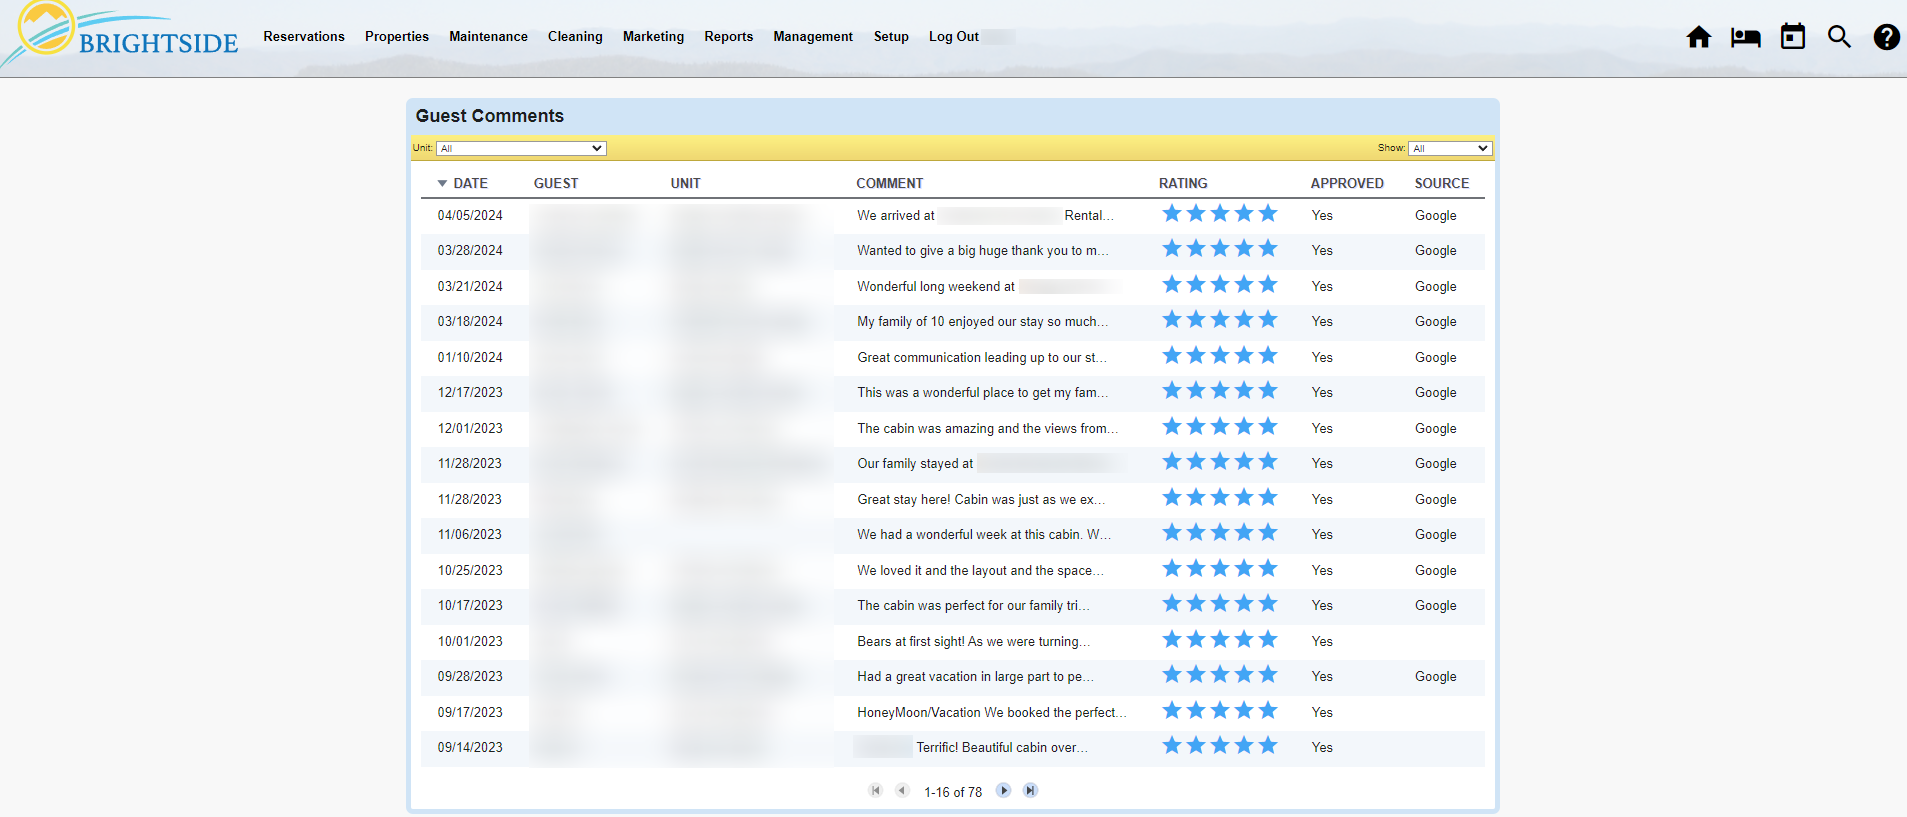
Once connected, BrightSide automatically imports your reviews. When you go to the Guest Comments page in BrightSide, you can see all your reviews, with the sources identified. If the source is BrightSide, it will be blank. If it is from Google, it will be identified as such.
Importing Google Reviews
Click on Image for Enlarged View
Responding to Google Reviews
- Header: The header identifies source of the comments. If it is from Google, it will read Google Comment.
- Date: This is the date the guest submitted the review to Google.
- Guest: The name of the guest.
- Unit: The unit where the guest stayed.
- Rating: The star rating entered by the guest.
- Comment: The full content of the comments submitted to Google.
- Private Comment: Enter any comments for your records. These comments do not show up anywhere publicly.
- Response: Enter your response to the guest review. This response will be posted on Google, and on your website, if you approve the comments in the next step.
- Approved: By ticking this box, you are approving this review for publication on your website, *if it is integrated. It will not have any impact on Google and what they publish.
- Archived: Tick this box to archive the comment. This prevents it from showing up in this list and on the website, even if it was an approved comment. Do not archive comments you want to show up on your website.
- Reservation: Begin typing the name of the guest and a list of reservations appears in a dropdown. You may select the matching reservation to connect the review.
*NOTE: Depending on how your website is set up, BrightSide Guest Comments may or may not show up there. If BrightSide manages your website, we can easily integrate these comments on the unit pages.
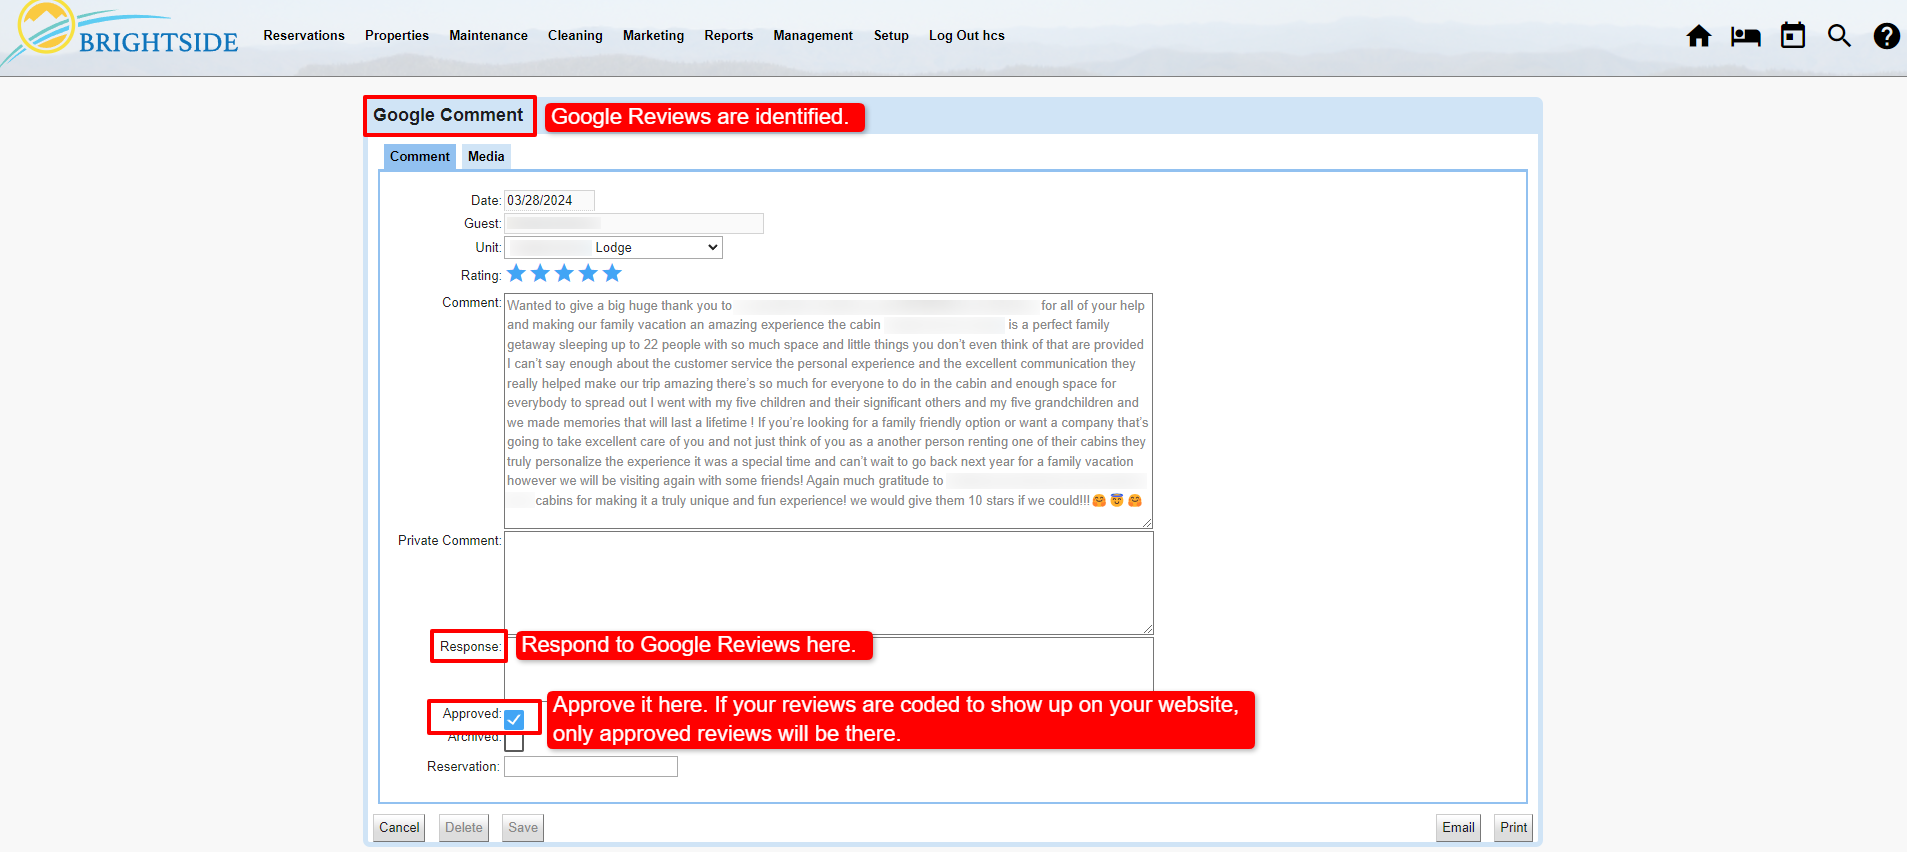
Responding To & Approving Reviews
Click on Image for Enlarged View