Summary
“Rate Seasons” allows you to apply categories of rates to the calendar based on expected demand.
Creating Rate Seasons
Plan Your Seasons
How many rate seasons do you need? That depends on how creative you want to be and what helps you manage your rates best. You could keep it simple with just two seasons, high and low, if that suites your purposes. You could be more complex and assign high season weekdays, high season weekends, holidays, low season weekday, low season weekends, peak season, and so on.
If you manage cabins in Gatlinburg, Tennessee you likely have two “Peak” seasons, one in October and another from June to August. In BrightSide, you can create one “Peak” season and apply it to the calendar in October, June, July, and August.
However, if you charge different rates for various holidays, you need to create a rate season for each. For example, if you charge one rate for the July 4th holiday and another rate for the Christmas holidays, you need to create two separate rate seasons.
You may create as many rate seasons as needed. Whatever you decide, this is how you create them.
NOTE: You are creating the Rate Seasons here, not entering rates. Rates need to be entered in each unit under the Rates tab AFTER you finish creating the Rate Seasons.
Navigate to: Units > Rate Seasons
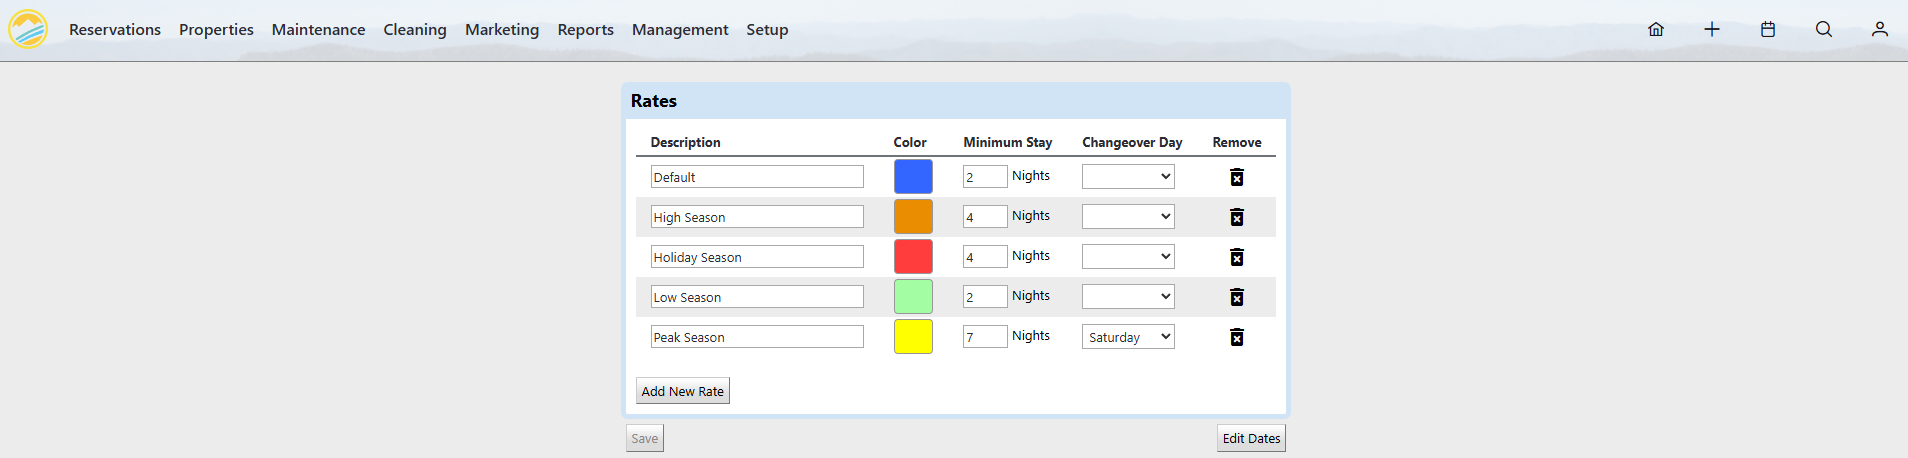
Rate Seasons Setup
Click on Image for Enlarged View
In the example above, we created five rate seasons: Default, High, Holiday, Low, and Peak. Follow the steps below to add a season.
- Click “Add New Rate”
- Enter the name of your new season in the first field under “Description.”
- Select a color by clicking the box. The color is displayed on your Unit Calendar to easily identify the season.
- Enter the minimum nights guest are required to stay for this season. This is the default value and may be overridden in each unit if needed.
- During peaks seasons, you may have a required changeover day. Enter it here, but keep in mind that you may override this in each unit if needed.
- Save
Assigning Dates to Rate Seasons
Edit the Rate Calendar
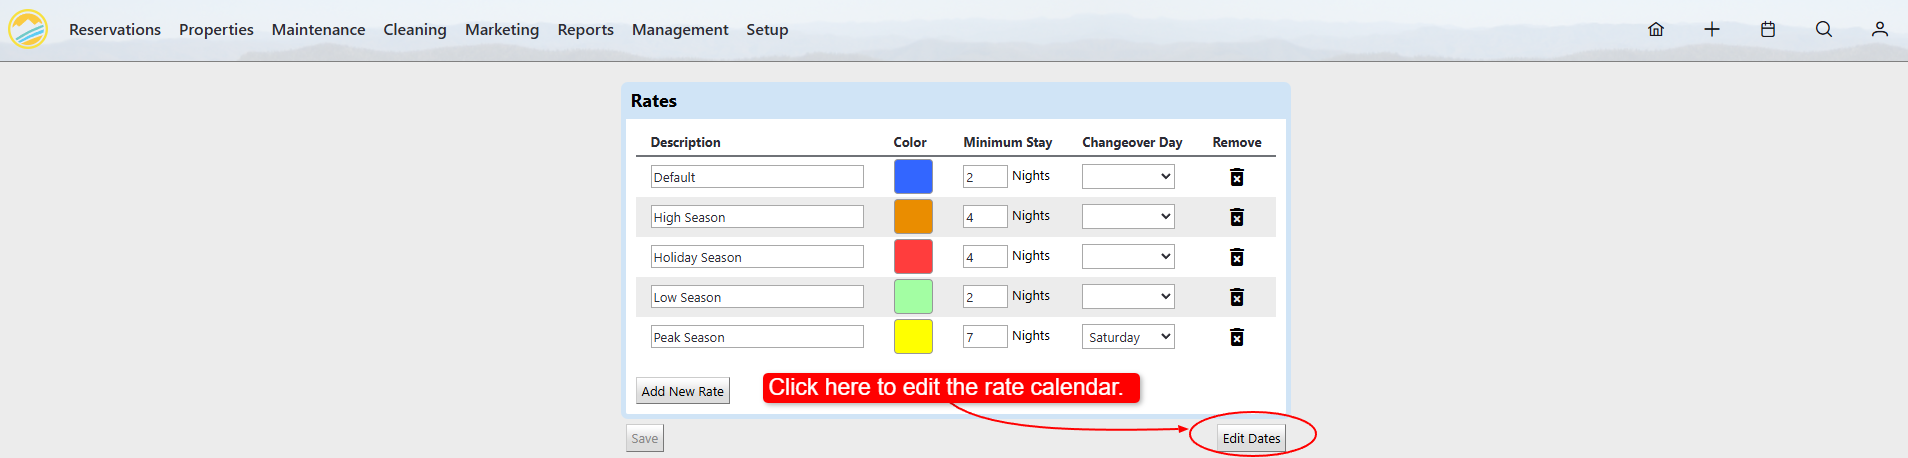
Now that you finished creating your seasons, you must add them to the calendar. Click on “Edit Dates” in the bottom right corner of the screen as shown in the image.
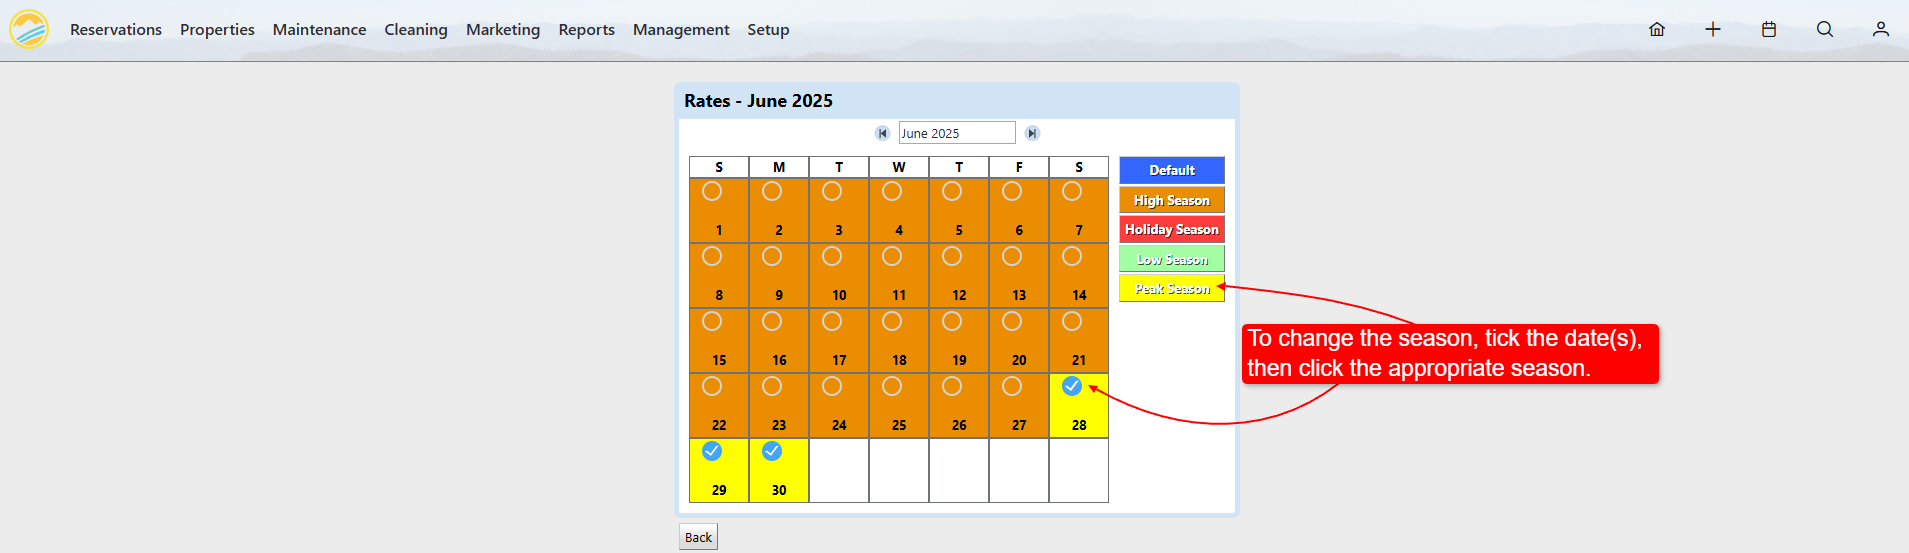
Edit Rate Seasons Calendar
Click on Image for Enlarged View
To assign rate seasons to the calendar, please follow the steps outlined below.
- Navigate to the month you want to edit by clicking the right or left arrow buttons.
- Tick the circle for the dates you want to assign a new rate season. (You may select a group of dates by clicking the first date, then holding down shift, then selecting the last date you want to edit. All the dates in-between will be selected.)
- Click the desired rate season from the list on the right. The selected dates will change to that rate season.
- The changes automatically save.
Selecting Dates
Click on Image for Enlarged View
After assigning Rate Seasons to the calendar, you need to enter the rates for each unit. Follow the instructions below to complete the process.
Assigning Rates to Rate Seasons
Entering Rates
So far in this tutorial, you learned how to create rate seasons and assign them to the calendar. Now you need to enter the rates for each season within the individual units. Follow the instructions in this Knowledge Base article Adding Units (Properties).