Summary
Hopper has ranked as the #1 travel app in more than 70 countries. Travelers can search for and book hotels, flights, car rentals, and vacation homes. BrightSide is a certified integration partner. To list your properties on Hopper, follow the instructions below.
Hopper
Create a Hopper Account
- Signup for a Hopper Hosting account.
- When you receive an email from Hopper Homes, click on “Join Hopper Hosting” to set a password.
- Sign into your BrightSide account and follow the instructions in the BrightSide section below.
Existing Hopper Accounts
Switch Providers
These are the steps to take if you are already live on Hopper but want to switch to the BrightSide API integration.
Hopper cannot merge your listings from two different providers, so the old listings needs to be delisted and the new listings need to be imported and activated.
- Deactivate your properties on your old Hopper account.
- Choose BrightSide as your new provider setup instructions using the API connection guide, and then proceed to follow the provided steps to setup a new Hopper account and importing your listings from BrightSide. Should you wish to utilize the same email login as your previous account, reach out to Hopper Partner Support at hosts@hopper.com. They will assist you in removing the email from your old account, as attempting to set up a new account with the same email will be unsuccessful.
- If you use ACH payout, reach out to hosts@hopper.com to ask the payout method to be transferred from the old to the new account.
Existing Reservations
Existing reservations in your old account cannot be migrated to the new account so you must ensure your calendar in BrightSide is updated. Keep a login email to your old host account to keep an eye on upcoming reservations. The main consideration is that the guest may cancel a reservation and it will not sync to BrightSide. We recommend reaching out to the effected reservations and request the guests communicate with you directly regarding any changes to the reservation.
NOTE: Hopper does not import existing listings. If you already have listings on Hopper and use iCal syncing, you must archive those listings, connect to BrightSide, then re-create the listings.
BrightSide
Connect BrightSide to Hopper
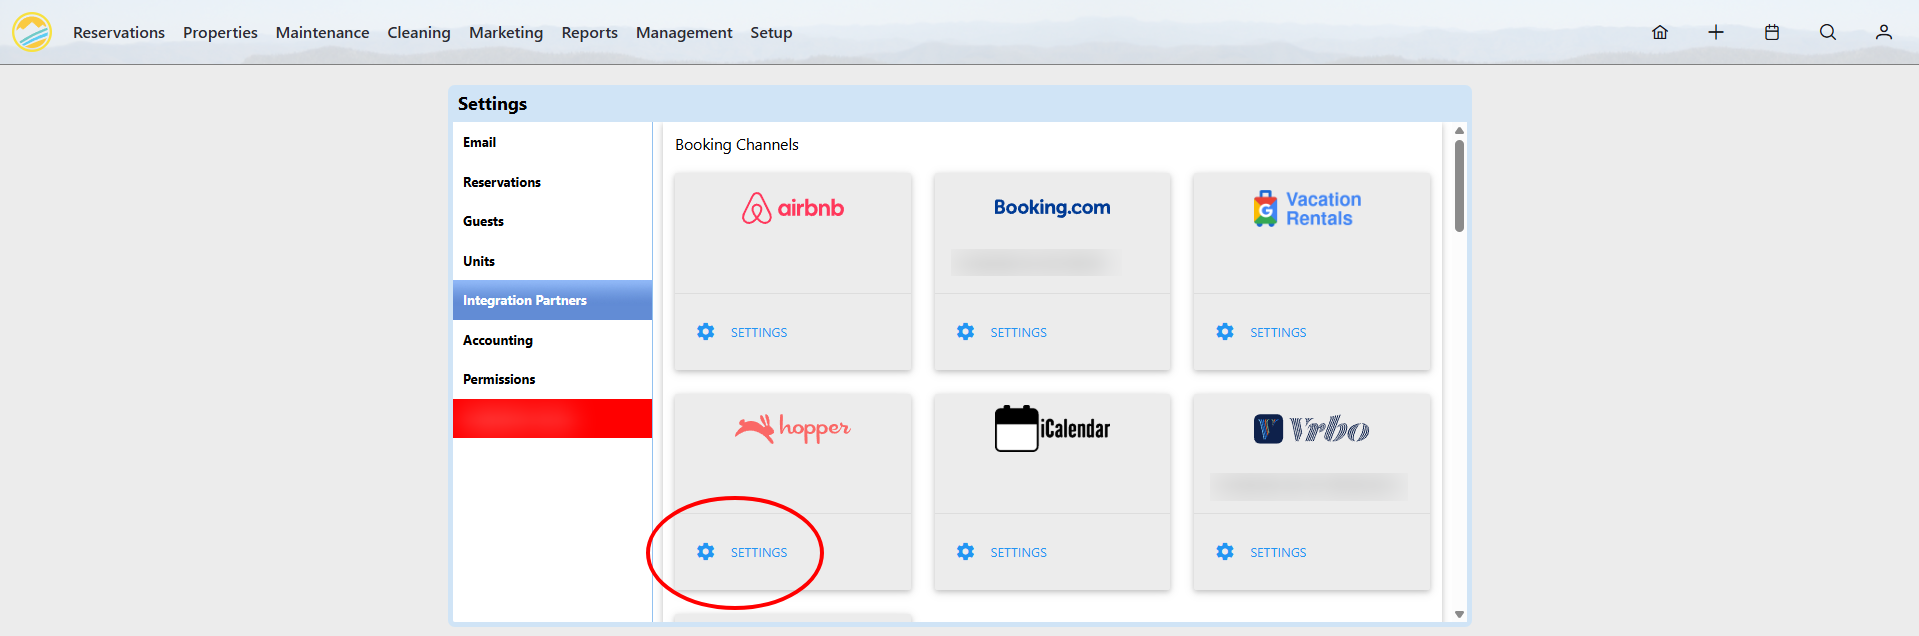
Navigate to: Setup > Settings > Integration Partners > Hopper
Navigate to the Hopper settings and click on “Settings,” then follow the instructions.
Hopper Settings
Click on Image for Enlarged View
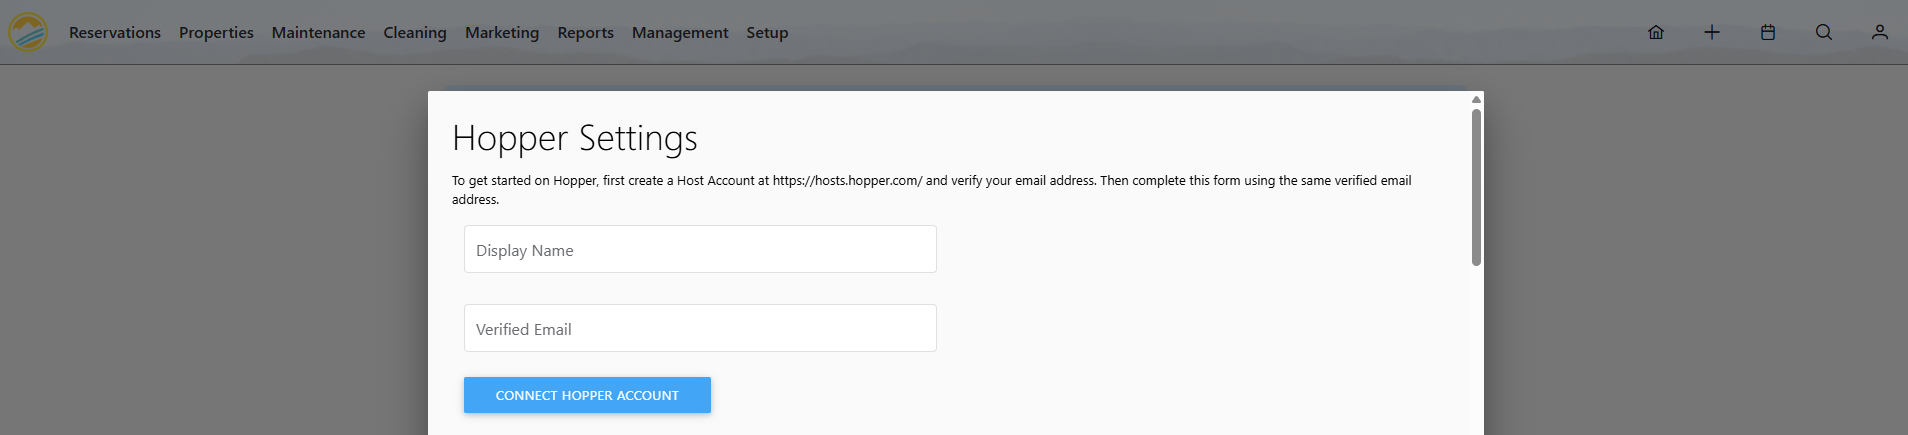
Hopper Settings
- Display Name: Enter the display name you want for your Hopper public name on your host account.
- Email Address: Enter the email address you used to sign up for Hopper. You must use a verified address.
- Connect: Click the “Connect Hopper Account” button.
Hopper Display Name and Email
Click on Image for Enlarged View
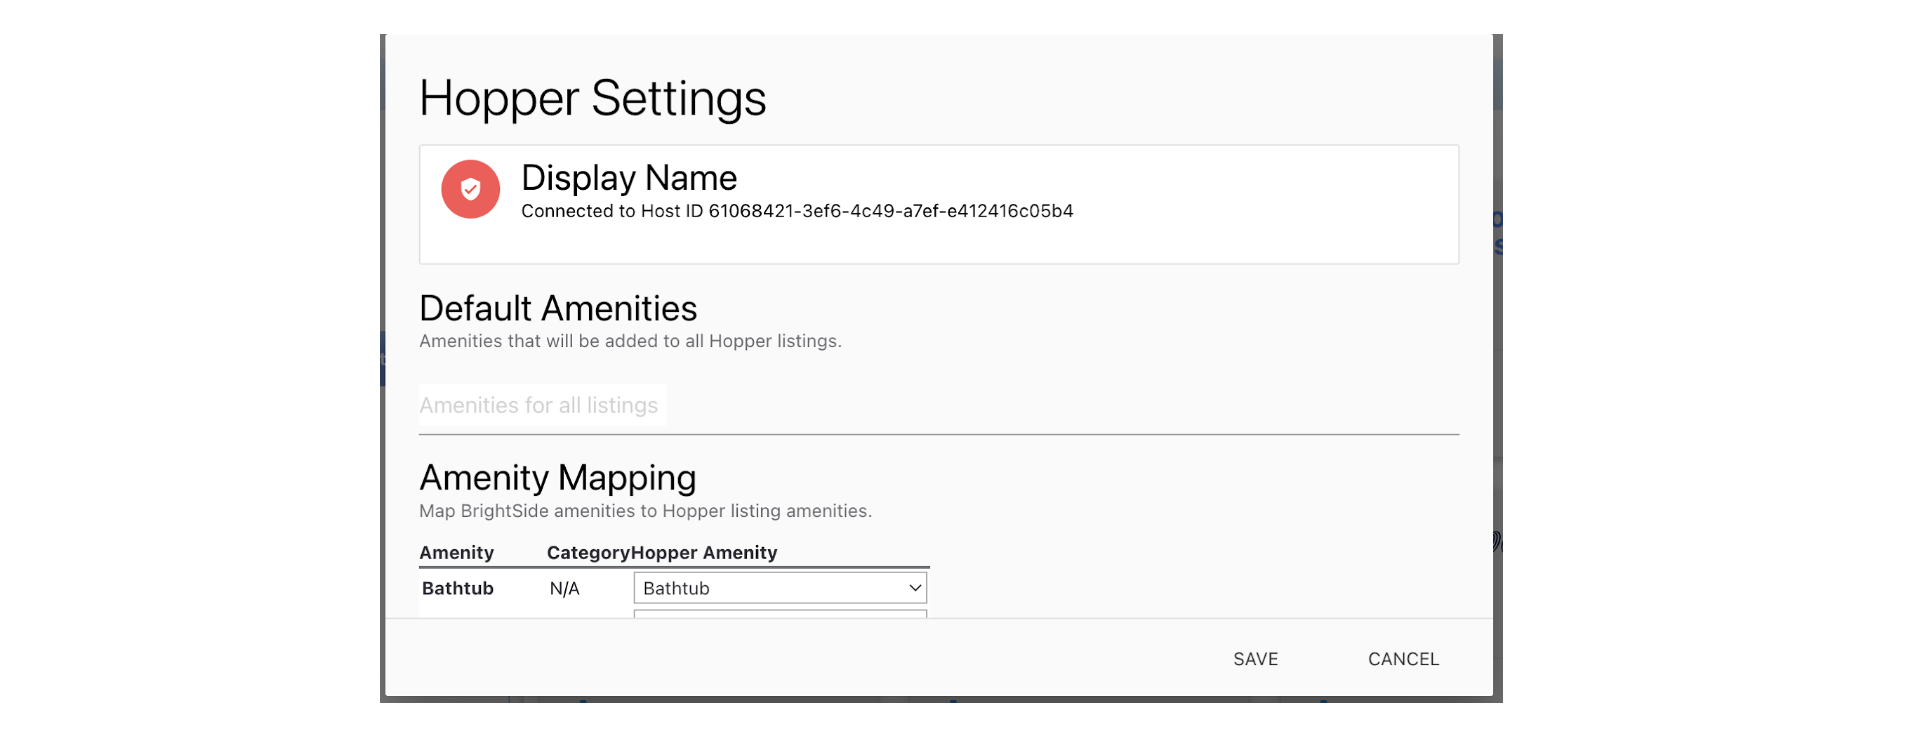
Hopper Connection
- After successfully creating your host account, the screen will change to display the connected account.
Hopper Connection
Click on Image for Enlarged View
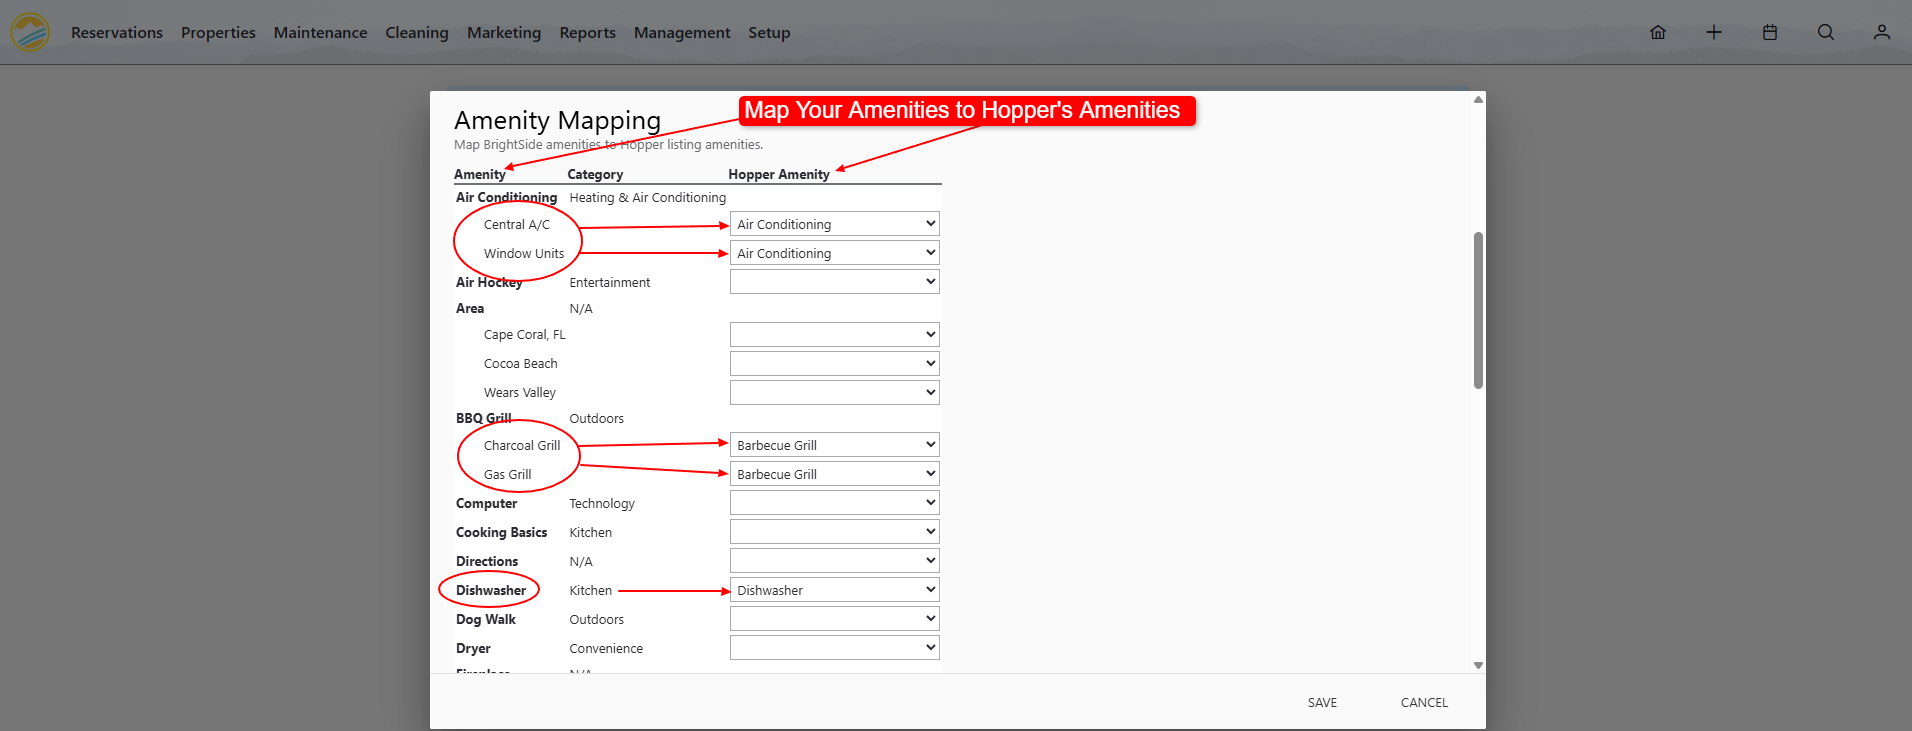
Amenity Mapping
- Amenities that apply to ALL units, may be selected in Default Amenities.
- Finish the Hopper setup by mapping your BrightSide amenities to those supported by Hopper. The amenities in the left column are pulled from your master list of amenities. The dropdown on the right are the amenities Hopper supports; match them as best you can. If you haven’t created your amenities, follow the instructions in the knowledge base.
Mapping Amenities to Hopper
Click on Image for Enlarged View
Booking Settings
- Select your Hopper Cancellation policy from the dropdown menu. You have several from which to choose.
- Select Hopper Markup from the dropdown menu when you want to mark up the rent to cover your service fees. If you haven’t created your Hopper Markup fee, follow the instructions in the knowledge base.
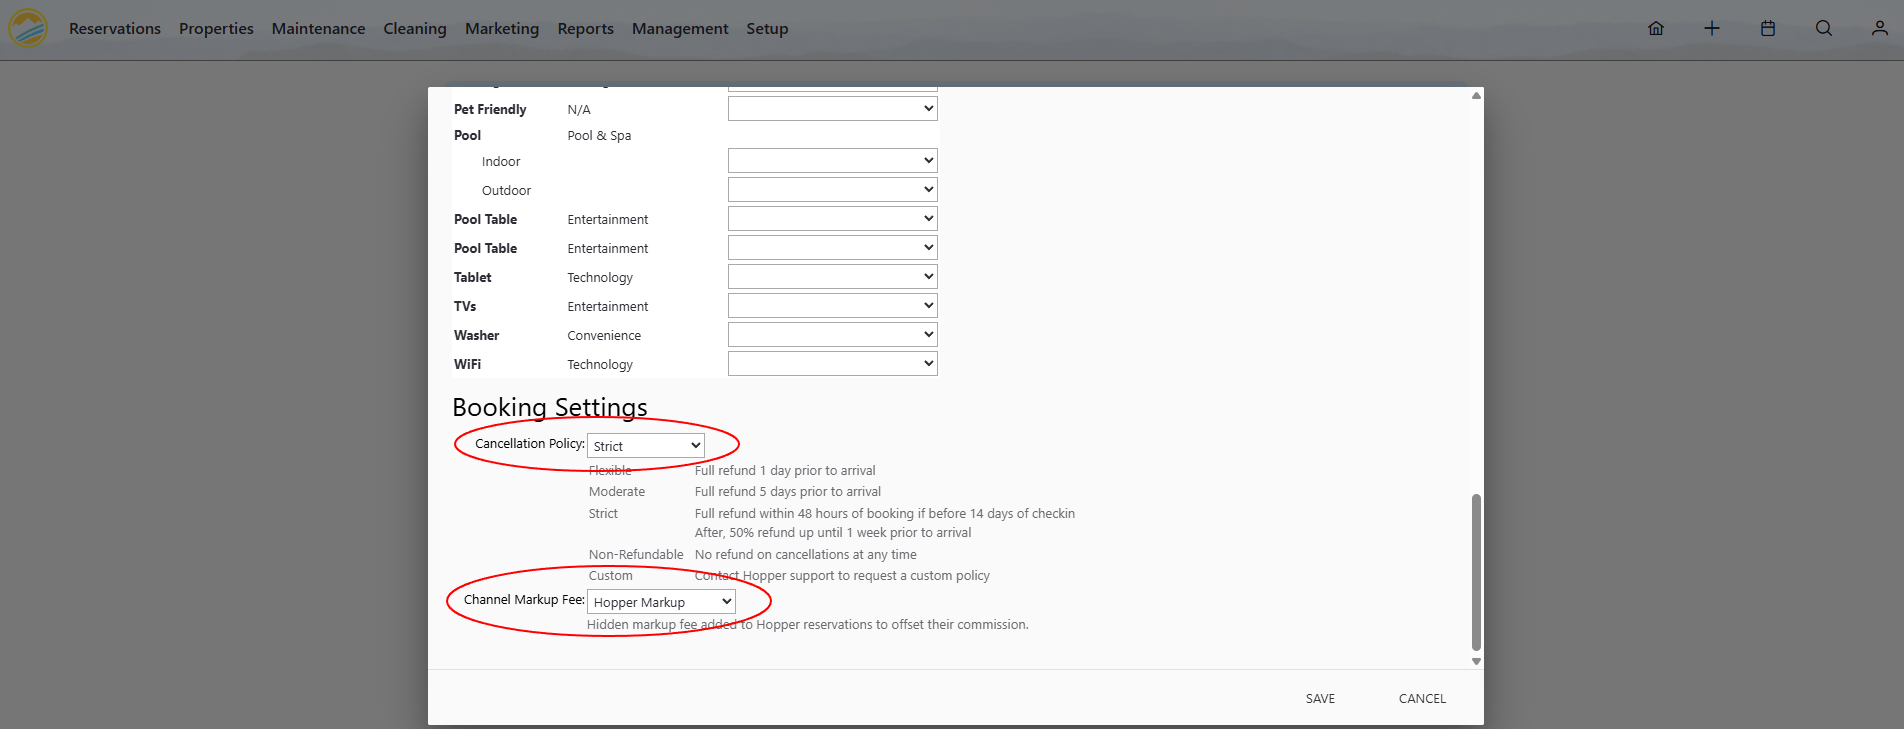
Hopper Cancellation Policy and Markup
Click on Image for Enlarged View
Create New Listing
Navigate to: Properties > Units > Select a Unit > Hopper (tab)
- Click the Create New Listing button for each unit you want to list on Hopper.
- Customize your listing by completing all the fields.
- Toggle on the Activate on Hopper switch.
- Your properties will sync to Hopper and be available to book.
Review Active Hopper Listings
- You may review your active listings by logging into the Hopper Portal.
- Verify your contact information under: Settings > Reservation & Emergency Contact Information.
- Verify your payout method under: Settings > Payout Methods.
- Visit the Hopper Help Center
- Visit the Hopper Host Portal
- Hopper Partner Support for Listings & Account: Monday to Friday, hosts@hopper.com
- Customer Support for Reservations & Guests: 24/7, homesreservations@hopper.com