Summary
This tutorial assumes your BrightSide account is already connected to a Vrbo account and you simply want to add a new listing. If your BrightSide account is not integrated with Vrbo yet, follow the instructions in the Vrbo Integration tutorial.
NOTE: BrightSide is designed to sync with Vrbo utilizing our custom API. Unlike some PMS software, BrightSide does not use a channel manager to communicate with Vrbo. Our custom API “talks to their system directly.” Also, keep in mind that BrightSide overrides Vrbo data, not the other way around.
Navigate to: Properties > Units > Select Unit > Vrbo (tab)
Prepare & Activate
Existing or New Unit
You may have a unit in BrightSide that has existed for some time, but it is not listed on Vrbo. Or, you may be adding a brand new unit to your portfolio. Either way, begin in BrightSide with the unit you want to add to Vrbo.
Vrbo Tab
BrightSide allows you to enter unique information for each of the online travel agencies in your units. Instead of having identical descriptions on your website, Airbnb, Vrbo, and Booking.com, you may offer original content for each. This will help your own website’s SEO (search engine optimization).
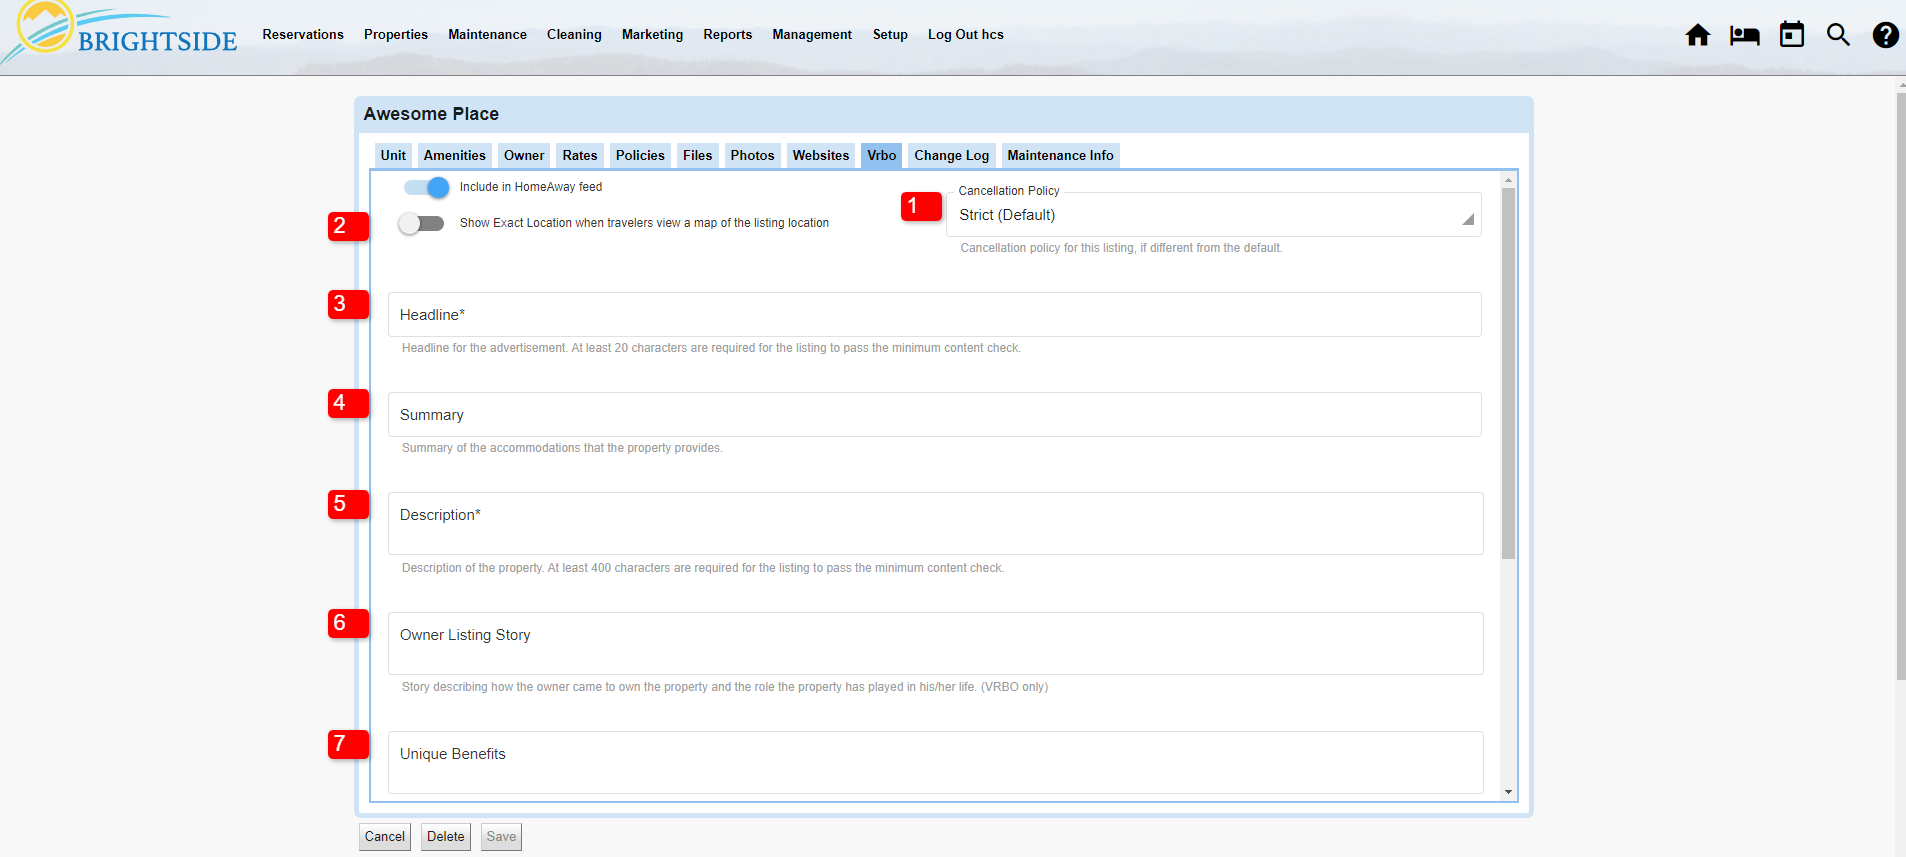
- Cancellation Policy: The default cancellation policy set in Vrbo Integration Partners is shown. If this unit needs a different cancellation policy, you may choose it from the dropdown.
- Show Exact Location: If left unselected, the map will show guests the general area of the unit, but not the exact location. When activated, guests may see the exact location of the property. After booking, guests will always be able to see the exact location.
- Headline: Enter a unique headline using up to 80 characters.
- Summary: Enter a summary using up to 80 characters.
- Description: Enter a detailed description of the property using a minimum of 400 characters and a maximum of 10,000 characters. If you do not enter any information here, the Website Description from the Unit tab is displayed on Vrbo. If the description is shorter than 400, or more than 10,000 characters, it could prevent your unit from being activated on Vrbo.
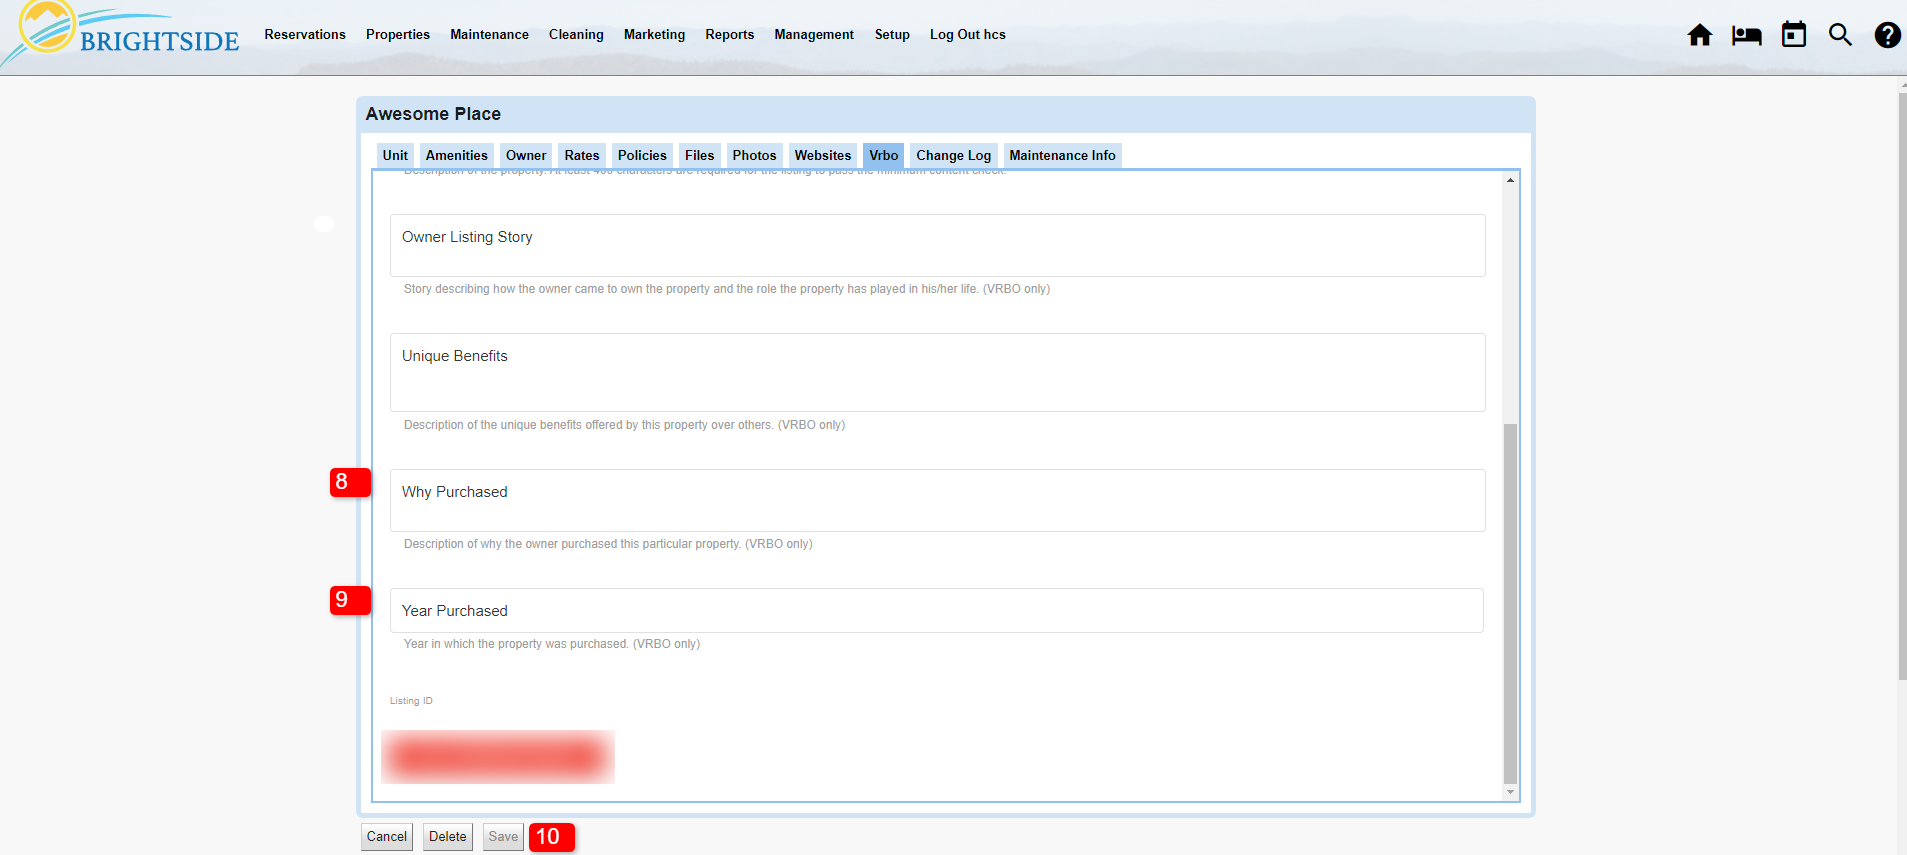
- Owner Listing Story: Optional, but can be useful of there is a great story behind the rental.
- Unique Benefits: Optional, but provides an opportunity to promote the reason you think guests would benefit from staying at this property.
- Why Purchased: Optional, tell the story of why you purchased this property.
- Year Purchased: Optional, enter the year you purchased the property.
- Save: Always save your changes.
Common Questions
Q. How long does it take Vrbo to activate my property so I can see it live on their platform?
A. After you complete all the steps in BrightSide to activate a property, it takes Vrbo at least 48 hours to review the unit details and approve it for publication on their site. This is a manual process and it can take as many as 72 hours.
Q. I went through all the steps to activate my property on Vrbo, but I am getting an error message saying I need to upload photos, enter rates, etc. Why?
A. This is an indication that Vrbo has not completely processed the onboarding of your unit. If you entered all these details, the only thing to do is wait 48 to 72 hours.
Q. My property is active on Vrbo and I made an update in BrightSide, however, the change is not showing up on Vrbo. Why?
A. Vrbo does not update in real time like Airbnb. Vrbo accesses the BrightSide database once a night and pulls the updated information from our servers. They then process that data and update the units on their end. This can take as many as 24 hours to complete.

