Summary
The email feature in BrightSide uses predefined templates to communicate with guests, owners, housekeeping, and maintenance. In this article, we will show you how to set up an email message template to go out automatically at predetermined times. You may also manually send an email message from one of these templates. Keep in mind, BrightSide sends messages out, but any incoming email will be routed to a separate email account outside of BrightSide.
NOTE: The email message templates in BrightSide are ALL connected to reservations. In other words, you cannot send an email to someone who does not have a reservation or is not associated with a reservation, like the owner or cleaner. These templates can be set up to go out automatically, or manually if you prefer.
Navigate to: Setup > Edit Guest Letters > +Add Template (blue button)
Adding a Template
Select Template Type
The “Guest Letter Template” is used to create templates for three different types of communications: emails, texts, and OTA channel integrated messaging. In this example, we are using the “Email” option.
In this first step, select “Email” as the type of template you are creating. Most of the features work the same for email and texting. However, the “Channel” options work a little bit differently, which are explained in the Knowledge Base article, Creating a Channel Messaging Template.
In the “Letter Name” field, give this template a name that is easily recognizable, and distinguishable, from other texts and emails. You may also enter a subject in the Subject field.
NOTE: The “dynamic text short codes” may be copied and pasted into the subject field if you want to use them there.
Content
The content for an email message can be as short or long as you need it to be. As a general rule, people don’t read lengthy emails. Enter just what is necessary and nothing more. BrightSide recommends keeping it short, and using dynamic text to make your emails personal.
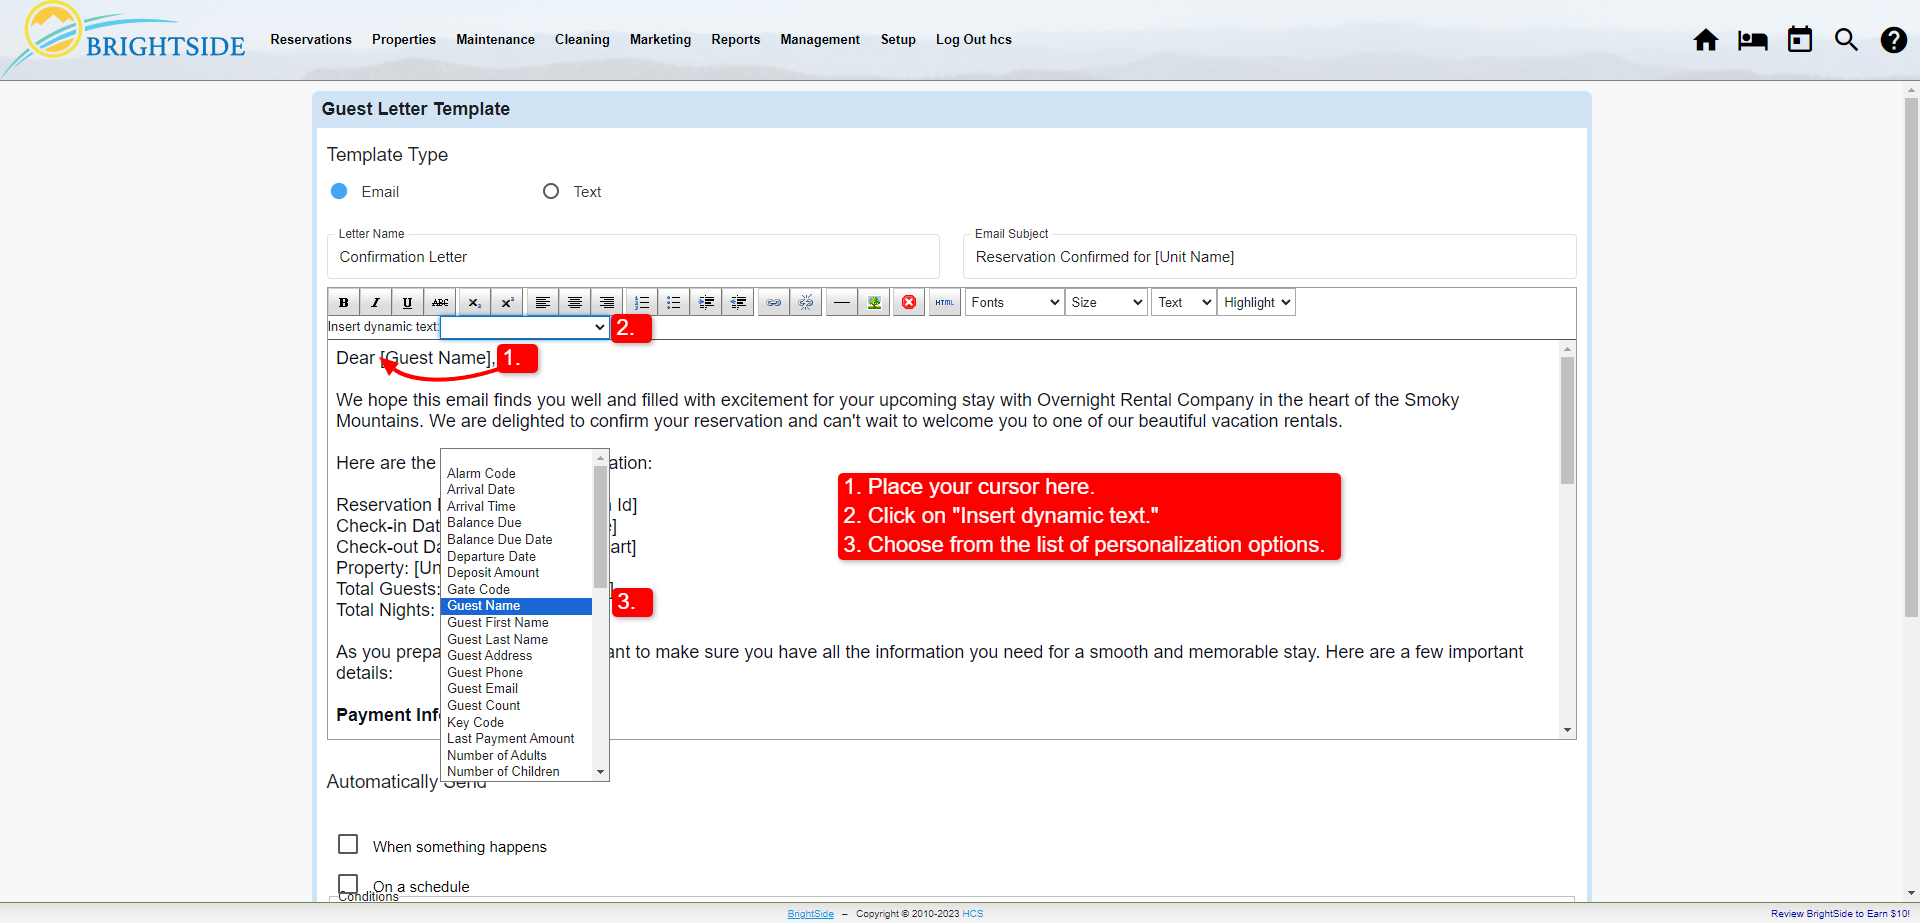
- Dynamic Text: you can create a generic template that is easily personalized by inserting dynamic text into the body of the email. Place your cursor in the email where you want to insert the information, then click on the “Insert dynamic text” dropdown. You can choose from nearly 50 options, like guest name, unit name, check-in date, check-out date, and others.
Automatically Send
Now that you have content, you need to set the parameters for sending the email. There are two types of triggers that automatically send an email:
- When something happens.
- Select from the following triggers: Reservation Taken, Deposit Confirmed, Checkin, Checkout, Reservation Cancelled, Reactivated, Balance Due, Balance Paid, or Documents Signed, Contract Signed, or Payment Added.
OR
- On a schedule.
-
- Select from the following triggers: On/Before/After: Booking Date, Arrival Date, Departure Date, Cancellation Date, Balance Due Date, or Rebooking Date. Select a time of day also.
- Tick the box next to “Send immediately if reservation made after date has passed” if needed. This is useful when a guest books a reservation after the condition for triggering the letter has passed.
HINT: Create unique email templates for each occasion that you want to send an email. For example, if you want to send an email when the reservation is taken, create a template for it. If you need to send another email after “Checkin” containing the entry codes, create another one. Remember, if you select both types of triggers, they will both send.
Add Conditions
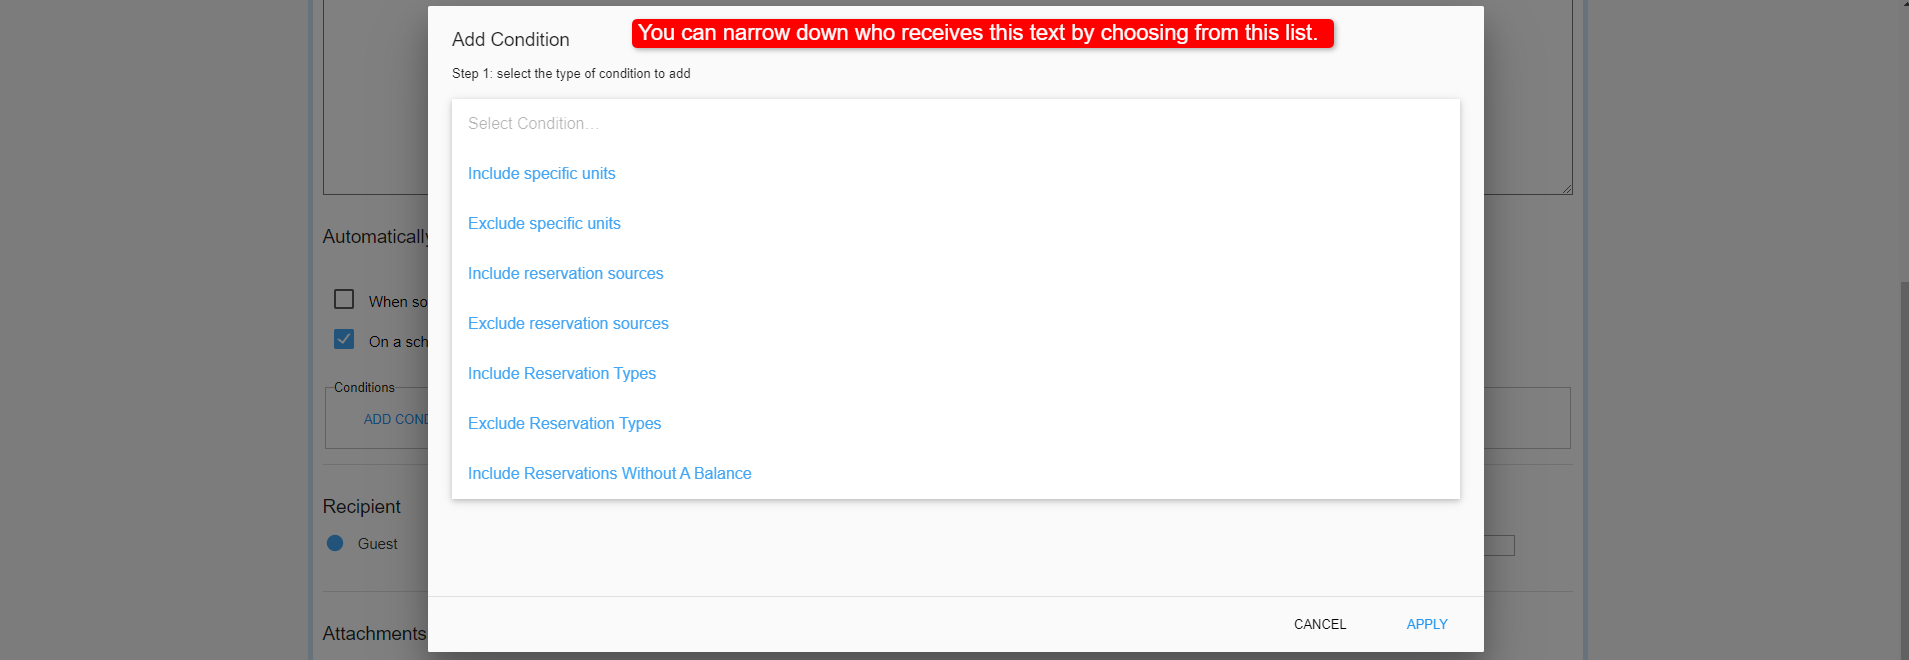
BrightSide allows you to set conditions determining who receives a particular email. You may include guests in specific units or exclude guests in specific units. You can set up an email to only go out only to specific reservation sources, like Airbnb, or Vrbo. There are a number of conditions from which you may select.
Select from the following Conditions:
- Include Specific Units
- Exclude Specific Units
- Include Reservation Sources
- Exclude Reservation Sources
- Include Reservation Types (the default stay types are Guest, Owner, Owner Guest, and Maintenance)
- Exclude Reservation Types
- Include Reservations without a balance
- Exclude Reservations without a balance
- Include Reservations with Travel Insurance
- Exclude Reservations with Travel Insurance
- Include Reservations with Fee/Charge
- Exclude Reservations with Fee/Charge
- Include Reservations with All Required Documents
- Include Reservations Missing Required Documents
- Include Reservations with Specified Amenity/Amenities
- Exclude Reservations with Specified Amenity/Amenities
Recipient & Attachments
Choose who is going to receive this email. Is it the guest, owner, cleaner, or someone else? If this is an email, you may also choose to include an attachment. Be careful not to choose more than one or two attachments, filters could designate it as SPAM and fail to deliver it.


