BrightSide Software logo

Short Term Vacation Rental Software
Hospitality PMS

Our cloud-based hospitality software is both powerful and easy to use. But more importantly, our support team is here for you, ready to help make your user experience the best it can possibly be.

  1. BrightSide is powerful and easy to use from anywhere you have Internet access.
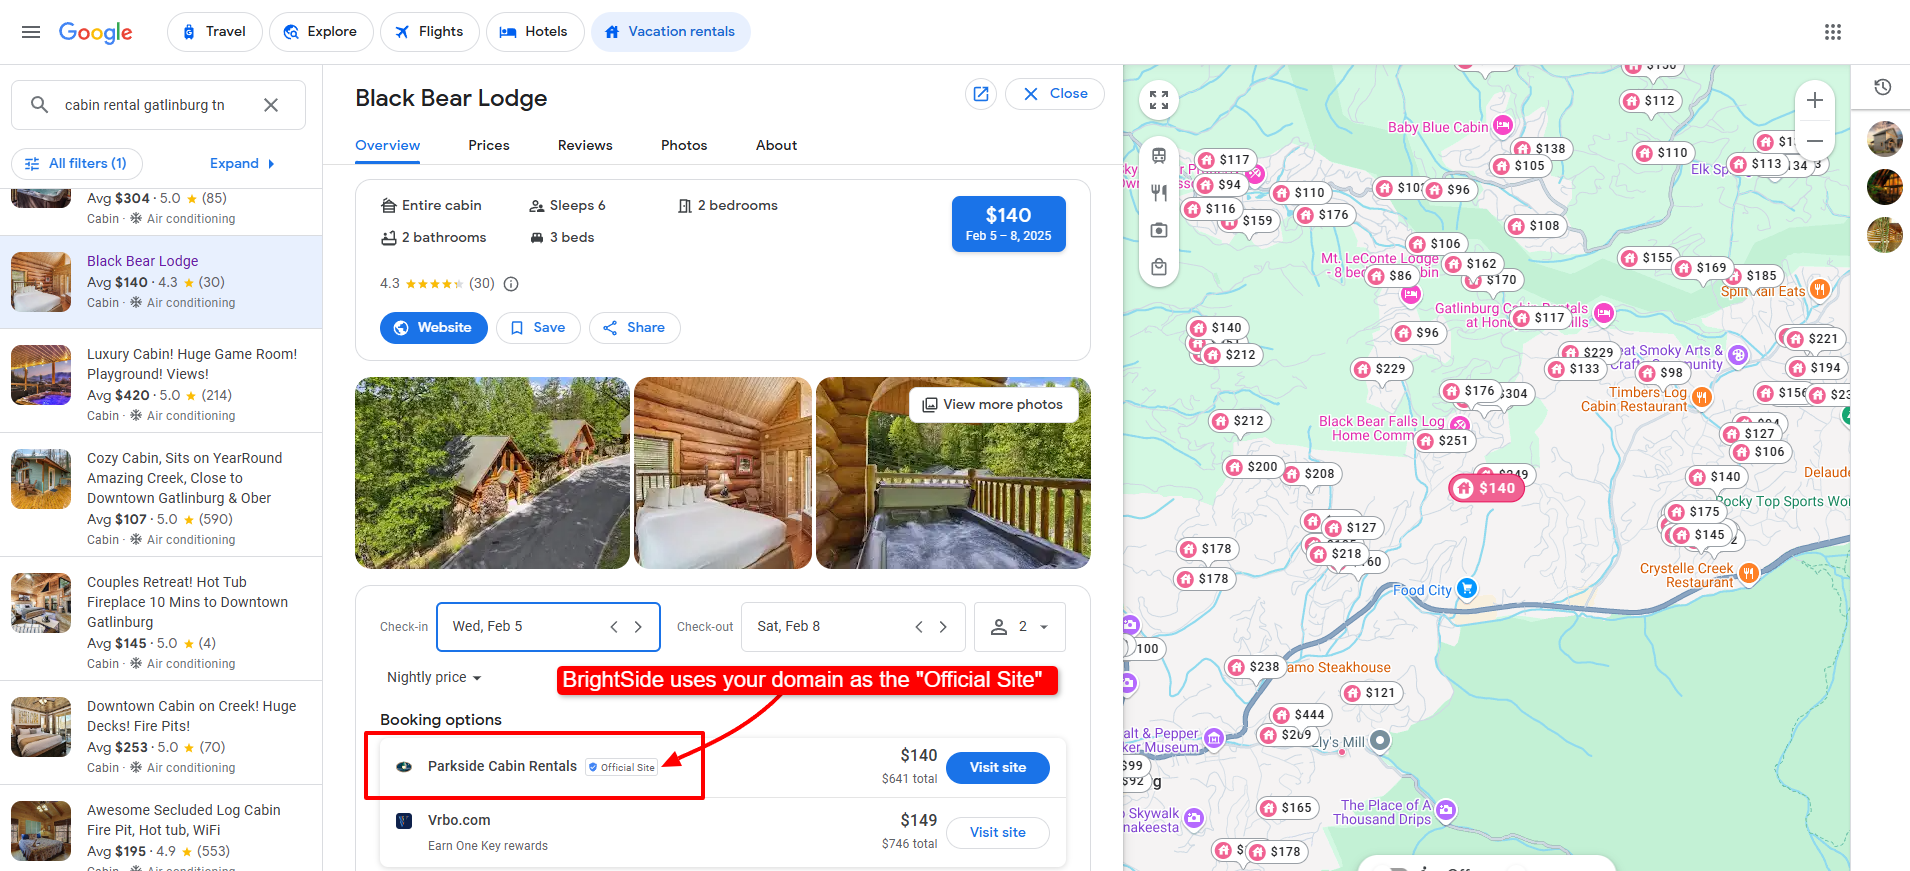
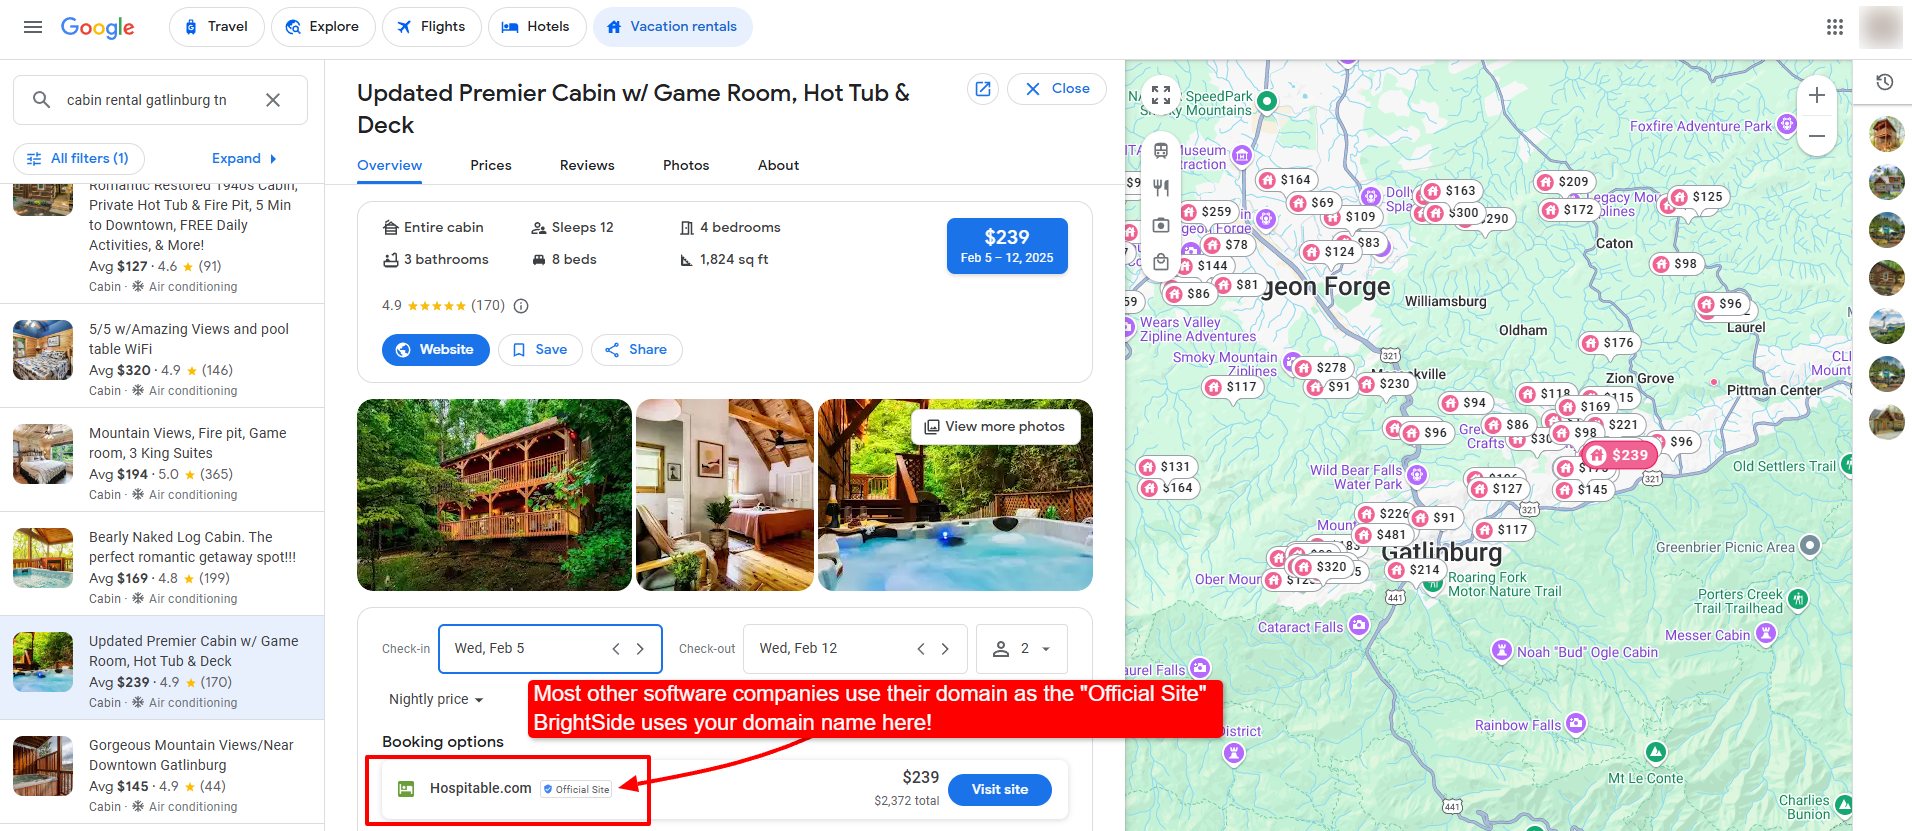
  2. BrightSide’s API integrates directly with Airbnb, Vrbo, Booking.com, Google Vacation Rentals and others.
  3. BrightSide support responds to email requests in minutes or hours, not days or weeks. No AI, real people.
  4. BrightSide support answers the phone. If we can’t answer, leave a message and we will call you back. Really.
  5. BrightSide is affordable. We do not add charges for features; it’s all included in the subscription.

About BrightSide Support

This author has not yet filled in any details.
So far BrightSide Support has created 34 blog entries.

September 9, 2024

2024-09-09T10:05:55-04:00

New Features & Updates

Added an owner contract “end date” field for units. You no longer need to block dates using maintenance blocks when a unit leaves the program.
Added the ability to pay owners utilizing an alternate bank account when they own multiple units and require a separate payment for each.
Added the ability to change the name on a credit card payment after it has been processed. Permission based.
Updated the API so “Guest Comments” can be pushed out to SmokyMountains.com and other websites.
Updated header in Vrbo message threads to include the guest name in some threads where it was missing.
Added the ability to select “All” on the “Checkin List” so you may check in everyone with just two clicks.
Updated guest letter conditions to enforce all required documents received.
Added the ability to turn on and off Vrbo, Airbnb, and Booking.com messaging.
Added the ability to edit the cleaning log.
Added review integration to Google Vacation Rentals listings.

Bug Fixes & Performance Improvements

Fixed a minor bug with the Extend Stay button.
Updated the server processing so photo resizing does not cause BrightSide to load slowly.
Fixed a bug where the default “State” value in the credit card screen caused a “Declined” status when making a payment in the guest portal.
Fixed a bug where the Vrbo messages had incorrect time stamp.
Fixed a bug where clicking “balance” did not enter the correct amount in the payments tab.
Fixed the Breezeway sync so it correctly updated when a reservation is moved.
We are currently working on some behind the scenes updates to improve the speed and performance of BrightSide.

Support Requests Since July 15, 2024

Completed and closed 298 support requests.
Answered 676 incoming support emails.
Answered 195 support phone calls and provided assistance.
Returned 100 support phone calls.

September 9, 20242024-09-09T10:05:55-04:00

BrightSide vs. Lodgify

2024-09-12T14:02:38-04:00

Comparison: BrightSide vs Lodgify

The following price comparison is based on ten properties under active management with $30,000.00* in monthly revenue with monthly subscription fees.

This chart does not include all the features of BrightSide or Lodgify. The purpose is to show some of the differences and similarities.

BrightSide includes ALL of our features in our subscription fee. We do not charge additional fees for features, unlike Lodgify.

BrightSide

$16000monthly
  • ✔ No booking fee
  • ✔ All Features Included
  • ✔ Email and Phone Support
  • ✔ Google Vacation Rentals Integration
  • ✔ Website Plugins
  • ✔ Direct API Channel Manager
  • ✔ Custom Automated Emails
  • ✔ Built-In Dynamic Pricing Tool
  • ✔ Dynamic Pricing Integrations
  • ✔ Cleaning Management
  • ✔ Maintenance Management
  • ✔ Built-In E-Signatures
  • ✔ Multiple Rental Agreements
  • ✔ Automated SMS Texts
  • ✔ OTA Message Integration
  • ✔ Messaging Workflows
  • ✔ Open API
  • ✔ Google Reviews Integration
  • ✔ Built-In Review System
  • ✔ iCal Link Support
  • ✔ Owner Reports
  • ✔ Owner Portal
  • ✔ Owner Statements
  • ✔ Guests – Adults and Children
  • ✔ Bed & Bathroom Allocation
  • ✔ Credit Card Preauthorization

Lodgify Starter

$6400monthly
  • + 1.9% booking fee ($570.00*)
  • No
  • Email Only
  • No
  • No
  • 0.8% Fee
  • No
  • No
  • No
  • No
  • No
  • No
  • No
  • No
  • No
  • No
  • No
  • No
  • No

Lodgify Professional

$19300monthly
  • No
  • 0.8% Fee
  • No
  • No
  • No
  • No
  • No
  • No
  • No
  • No
  • No
  • No

Lodgify Ultimate

$25700monthly
  • No
  • Email, Phone, Chat Support
  • 0.8% Fee
  • No
  • No
  • No
  • No
  • No
  • No
  • No

COPYRIGHT DISCLAIMER: The Lodgify logo is used under section 107 of the Copyright Act of 1976 where allowance is made for “fair use” when used for criticism, comparisons, commentary, teaching, and other purposes. The Lodgify logo belongs to its respective owner and this website does not claim any rights over it. The data from Lodgify was accessed from their website on 08/29/2024. While we do our best to provide up-to-date information, it may have changed over time, so we cannot guarantee the accuracy of this data.

Comparison: BrightSide vs Lodgify

The following price comparison is based on ten properties under active management with $30,000.00* in monthly revenue with monthly subscription fees.

This chart does not include all the features of BrightSide or Lodgify. The purpose is to show some of the differences and similarities.

BrightSide includes ALL of our features in our subscription fee. We do not charge additional fees for features, unlike Lodgify.

BrightSide

$16000monthly
  • ✔ No booking fee
  • ✔ All Features Included
  • ✔ Email and Phone Support
  • ✔ Google Vacation Rentals Integration
  • ✔ Website Plugins
  • ✔ Direct API Channel Manager
  • ✔ Custom Automated Emails
  • ✔ Built-In Dynamic Pricing Tool
  • ✔ Dynamic Pricing Integrations
  • ✔ Cleaning Management
  • ✔ Maintenance Management
  • ✔ Built-In E-Signatures
  • ✔ Multiple Rental Agreements
  • ✔ Automated SMS Texts
  • ✔ OTA Message Integration
  • ✔ Messaging Workflows
  • ✔ Open API
  • ✔ Google Reviews Integration
  • ✔ Built-In Review System
  • ✔ iCal Link Support
  • ✔ Owner Reports
  • ✔ Owner Portal
  • ✔ Owner Statements
  • ✔ Guests – Adults and Children
  • ✔ Bed & Bathroom Allocation
  • ✔ Credit Card Preauthorization

Lodgify Starter

$6400monthly
  • + 1.9% booking fee ($570.00*)
  • All Features Not Included
  • Email Only Support
  • No Google Vacation Rentals Integration
  • Website Plugins
  • Direct API Channel Manager
  • No Custom Automated Emails
  • Addon Dynamic Pricing – 0.8% Fee
  • Dynamic Pricing Integrations
  • No Cleaning Management
  • No Maintenance Management
  • No Built-In E-Signatures
  • No Multiple Rental Agreements
  • No Automated SMS Texts
  • No OTA Message Integration
  • No Messaging Workflows
  • Open API
  • No Google Reviews Integration
  • Built-In Review System
  • iCal Link Support
  • No Owner Reports
  • Owner Access
  • No Owner Statements
  • No Guests / Adults and Children Breakdown
  • No Bed & Bathroom Allocation
  • No Credit Card Preauthorization

Lodgify Professional

$19300monthly
  • No booking fee
  • All Features Not Included
  • Email and Phone Support
  • Google Vacation Rentals Integration
  • Website Plugins
  • Direct API Channel Manager
  • Custom Automated Emails
  • Addon Dynamic Pricing – 0.8% Fee
  • Dynamic Pricing Integrations
  • No Cleaning Management
  • No Maintenance Management
  • No Built-In E-Signatures
  • No Multiple Rental Agreements
  • No Automated SMS Texts
  • OTA Message Integration
  • Messaging Workflows
  • Open API
  • No Google Reviews Integration
  • Built-In Review System
  • iCal Link Support
  • No Owner Reports
  • Owner Access
  • No Owner Statements
  • No Guests / Adults and Children Breakdown
  • No Bed & Bathroom Allocation
  • Credit Card Preauthorization

Lodgify Ultimate

$25700monthly
  • No booking fee
  • All Features Not Included
  • Email, Phone, Chat Support
  • Google Vacation Rentals Integration
  • Website Plugins
  • Direct API Channel Manager
  • Custom Automated Emails
  • Addon Dynamic Pricing – 0.8% Fee
  • Dynamic Pricing Integrations
  • Cleaning Management
  • Maintenance Management
  • No Built-In E-Signatures
  • No Multiple Rental Agreements
  • No Automated SMS Texts
  • OTA Message Integration
  • Messaging Workflows
  • Open API
  • No Google Reviews Integration
  • Built-In Review System
  • iCal Link Support
  • Owner Reports
  • Owner Access
  • Owner Statements
  • No Guests / Adults and Children Breakdown
  • No Bed & Bathroom Allocation
  • Credit Card Preauthorization

COPYRIGHT DISCLAIMER: The data from Lodgify was accessed from their website on 08/29/2024. While we do our best to provide up-to-date information, it may have changed over time, so we cannot guarantee the accuracy of this data. The Lodgify logo is used under section 107 of the Copyright Act of 1976 where allowance is made for “fair use” when used for criticism, comparisons, commentary, teaching, and other purposes. The Lodgify logo belongs to its respective owner and this website does not claim any rights over it.

BrightSide vs. Lodgify2024-09-12T14:02:38-04:00

August 24, 2024

2024-09-09T10:06:18-04:00

The August Release Notes are just a few highlights of the many improvements and updates we made to BrightSide since June 17th.

New Features & Updates

Updated API between BrightSide and texting carrier
Updated Google Vacation Rentals Rate Season Restrictions
Updated the BrightSide API
Completed new integration with Breezeway
Added the ability to reauthorize Airbnb connection
Finalized Operto integration
Added ResortCleaning maintenance integration
Added ability to edit the cleaning log
Added a default setting for credit card fees
Added ability to turn on/off Vrbo messages
Add the ability to add the scheduled date to work orders
Added ability to automatically check in/out guests
Added Mailchimp integration

Bug Fixes & Performance Improvements

Fixed a bug that did not mark the new unit dirty when moving an Airbnb reservation to a new unit
Fixed a bug that prevented the inclusion of phone numbers in Airbnb guests’ file when exporting “Guest Mailing List CSV”
Fixed a bug that caused Vrbo messages to be duplicated in the messaging thread
Fixed a bug causing BrightSide to load slowly
Fixed a bug where the cleaner schedule was not saving
Fixed a bug with Breezeway causing reservations not to sync properly when moved to another unit
Fixed a bug where newly uploaded unit photos were being rearranged

Support Requests Since June 17, 2024

Completed and closed 380 support requests
Answered 1157 incoming support emails
Answered 196 support phone calls and provided assistance
Returned 124 support phone calls

August 24, 20242024-09-09T10:06:18-04:00

Creating a Channel Message Template

2024-08-08T17:04:35-04:00

Summary

BrightSide is capable of sending guest messages utilizing three different system types, email, SMS texts, and an online travel agency’s (OTA) messaging system. Currently, we are directly integrated with Airbnb, Vrbo, and Booking.com. The benefit of our integration is that it allows you to message guests through the OTA’s respective messaging system, directly from BrightSide. You may utilize BrightSide’s “Channel Guest Letters” feature to create custom communications for OTA guests.

In this tutorial, you will learn how to set up a guest message template to communicate with guests through the online travel agencies’ messaging systems.

Channel Messaging

What Is It?

BrightSide created direct API integrations with each of the online travel agencies’ messaging systems. This offers a way to create custom message templates within BrightSide, and send to OTA guests automatically through their systems. Our messaging system currently integrates with Airbnb, Vrbo, and Booking.com.

Why Use Channel Messaging?

  1. BrightSide’s channel messaging provides a central location to correspond with guests from Airbnb, Vrbo, and Booking.com, without having to log into those accounts elsewhere.
  2. You may automate OTA guest messages from the convenience of BrightSide.
  3. Airbnb no longer provides guest email addresses, making communication a multi-step process. This decision forced hosts to utilize the Airbnb messaging app to communicate with guests. Alternatively, you could call or text the guests and ask for their email address, which may or may not be given to you. Now you may send messages to guests from BrightSide whether you have their email addresses or not.
  4. You may create custom templates, designed to communicate a unique message to guests booking though various OTA channels. If you want to send Vrbo guests a different communication than those on Booking.com, you may do that.

Create a Channel Template

Navigate to: Setup > Edit Guest Letters > +Add Template (blue button)

Select the Template Type

From the “Template Type” dropdown menu select “Channel.” This differentiates your message from email and text templates and tells BrightSide to use the OTA’s messaging platform when sending the message.

If the guest books through Airbnb, BrightSide will use the Airbnb messaging system to communicate with the guest. If Vrbo is the channel they booked through, it will use the Vrbo messaging system, and so on.

Name the Template

Companies utilizing a large number of messaging templates understand the value of being specific when naming the message. For example, if you use email, channels, and texting to communicate with guests, you must be able to distinguish them in a dropdown menu within the reservation. If you create an arrival letter for each of these channels, and name them all “Arrival Information,” this will be confusing in a list.

We recommend naming each arrival letter and labeling it with the way it will be sent. The guest will not see the name of the letter.

  • Arrival Information (Airbnb)
  • Arrival Information (Text)
  • Arrival Information (Email)
  • Arrival Information (Vrbo)
  • Arrival Information (BDC)

NOTE: If you want to create a single message that sends to all OTA guests, you may do that. But by using separate templates you can refer to the specific OTA in the message without mentioned the others.

Creating a Channel Email Template | Type & Name
Template Type & Name

Click on Image for Enlarged View

Adding Content

As you think through the content for each channel, remember that you can use the dynamic text to personalize each message. The dropdown menu allows you to insert the guest’s name, unit name, gate code, door code, arrival date and time, departure date and time, and a whole lot more. This information is dynamically imported, so each message using this template is personalized for that specific guest.

NOTE: You may not use images, logos, or stylized text in channel messages, as they are not supported. Therefore, channel messages must only use basic text.

Creating a Channel Email Template | Adding Content

Click on Image for Enlarged View

Automatically Send

Channel guest messages may be set to automatically send at a specific time or event. Additionally, any of these messages may be manually sent when needed. The preferred method is to have the messages sent automatically. There are a couple of ways to trigger the auto send feature:

  • When something happens.
    • Select from the following triggers: Reservation Taken, Deposit Confirmed, Checkin, Checkout, Reservation Cancelled, Reactivated, Balance Due, Balance Paid, Documents Signed, or Contract Signed.

OR

  • On a schedule.
    • Select from the following triggers: On/Before/After: Booking Date, Arrival Date, Departure Date, Cancellation Date, Balance Due Date, or Rebooking Date. Select a time of day also.
    • Send immediately if reservation made after date has passed.

HINT: When using “On a schedule,” for your trigger, you also have the option to “Send immediately if reservation made after date has passed.” This is handy if you set a condition to send out a message a week before arrival, but they make the reservation five days before arrival. Checking this box ensures they will receive the email, since the triggering event has already passed.

Creating a Channel Email Template | Automatically Send
Automatically Send Settings

Click on Image for Enlarged View

Add Conditions

While it is unlikely you need all of the following conditions, they are available if/when you need them. The most used condition for channel messages is “Include reservation sources.” When you are connected to Airbnb, Vrbo, or BDC, these options appear after you select “Include reservation sources.” If you only want the message to go to Airbnb guests, only tick the box next to Airbnb.

  • Include specific units
  • Exclude specific units
  • Include reservation sources
  • Exclude reservation sources
  • Include Reservation Types
  • Exclude Reservation Types
  • Include Reservations Without a Balance
  • Exclude Reservations Without a Balance
  • Include Reservations Without Travel Insurance
  • Exclude Reservations Without Travel Insurance
  • Include Reservations with Fee/Charge

Corresponding with Guests

All correspondence with guests, both text and channel messages, takes place in Guest Messages. Keep in mind that BrightSide does not receive any incoming email. Those messages are routed to an email address outside of BrightSide. However, texts and channel messages can be managed here.

Navigate to: Reservations > Guest Messages

Guest Messages

When you receive a new guest message, a link to it will show up on your home screen. The link takes you to the thread in Guest Messages where you may respond if needed. After clicking on the link, it will be cleared from the unread messages on the home screen. To re-access the message, you need to go to Guest Messages or the “Communications” tab in the reservation.

NOTE: Within a reservation, the “Communications” tab provides links to any existing message threads and a link to start a new one if none exists.

Creating a Channel Email Template | Create a Message Thread
Create a Message Thread

Click on Image for Enlarged View

Creating a Channel Email Template | Link to Message Thread
Link to Message Thread

Click on Image for Enlarged View

Creating a Channel Email Template | Guest Message Threads
Guest Message Threads

Click on Image for Enlarged View

Creating a Channel Message Template2024-08-08T17:04:35-04:00

Using Escrow

2024-04-10T15:50:41-04:00

Summary

One of the most basic features in BrightSide is also one of the most misunderstood; escrow. This article is here to help shed light on how to use escrow in our app.

The Basics

What is Escrow?

If you have been managing short term rentals for a while, the odds are good that you know a few things about escrow accounts. However, for the uninitiated, here is a brief introduction. The majority of property management companies keep an escrow account and an operating account at their financial institution. Moneys received as deposits, i.e.: money that could possibly be refunded, and is thus “unearned,” remains in the escrow account until it is either refunded or earned. Once the money is considered earned, it is moved into the operating account.

What Goes Into Escrow?

Reservation Deposits & Payments

As mentioned above, when a guest pays a deposit against a reservation, BrightSide places it in “escrow” status. After all, the guest may cancel their reservation and you must return all, part, or none, of the deposit, depending on your cancellation policy. Deposits are not considered earned income in BrightSide until after a completed stay. This money is held in escrow until BrightSide automatically moves it after check-out.

When a reservation is booked and a deposit is paid, the deposit may include a number of items, including rent, fees, travel insurance, taxes, etc., depending on your settings. All of this money goes into escrow.

NOTE: When a reservation is cancelled, retained funds remain in escrow until you manually move it to your operations account.

Viewing Money in Escrow

Advance Deposits Report

All moneys received from a guest, or on a guest’s behalf, are automatically placed in escrow status within BrightSide. These funds remain in escrow until the stay is completed and the guest is checked out. After check-out, BrightSide automatically moves the funds out of escrow and into earned income status. The Advance Deposits Report lets you see the funds remaining in escrow.

BrightSide offers several options for running this report:

  • Detail – Shows the total advance deposits you should have in escrow. This report is broken down by month to help estimate income for future months. It also includes the departure date, reservation number, unit, guest’s name, and total deposit for each reservation. The detail report shows every active reservation with a deposit or pre-payment.
  • Summary – This report option only shows monthly totals rather than individual reservation details. It includes departure month, stays, nights, and total paid.
  • Monthly – Shows advance deposits or pre-payments received during the current month. This can help balance your cash flow at the end of the month. It includes the date received, reservation number, departure date, unit, guest’s name, and amount paid.

The Advance Deposits Report also allows you to include payments from a selected date, cancellations in escrow, and exclude travel insurance, if needed. This report may be exported to an Excel file for sorting or printed as a PDF.

NOTE: Reservation deposits from all sources go into escrow, including Airbnb, Vrbo, Booking.com, direct bookings, etc.

Using Escrow | Advance Deposits Report

Click on Image for Enlarged View

Cancellations in Escrow

Outstanding Cancellations

Unfortunately, guests cancel reservations. When they cancel, BrightSide places those reservations in cancelled status and the unrefunded part of their payments remain in escrow. To view all of the cancelled reservations, you may run a report that includes the reservation number, the date it was cancelled, the arrival and departure dates, unit, guest’s name, and the amount they paid.

NOTE: When you want to move the funds from a cancelled reservation out of escrow and into your operations account, go to Pay Out Cancellations.

Using Escrow | Advance Deposits Report

Click on Image for Enlarged View

Escrow Cash Flow Report

Summary

The Escrow Cash Flow report is available with two options, summary or details. Option one is a summary report, normally a one page document with total receipts broken into categories. You can see in the sample report below that we have broken the receipts category in a number of subcategories including, Cash, Check, Visa, Mastercard, American Express, Discover, and Refunds.

We also have a section for Advance Deposits that shows a beginning balance, a receipts line, and the amount transferred to revenue (or earned income).

The third section on the summary report provides totals for each source of revenue. For example, in the screenshot below you can see Rental Charges, Cleaning Fee, Damage Waiver, Pool Winter, Security Deposit, Travel Insurance, Tennessee Sales Tax, Sevier County Lodging Tax, and the Pigeon Forge Lodging Tax.

Using Escrow | Summary Escrow Cash Flow Report

Click on Image for Enlarged View

Details

Option two is a report with cash flow details, turning this into a document that can be dozens of pages long. The screenshot below does not include everything in this detailed report. However, it does provide a sample of what you may expect.

Using Escrow | Escrow Cash Flow Report with Details

Click on Image for Enlarged View

Escrow Reconciliation

Worksheet

After closing out the month, you may want to reconcile your escrow bank account with BrightSide. Think of BrightSide as your written record, sort of like a checkbook register. You want to reconcile BrightSide and your escrow bank account to ensure that everything balances. To make this easier, we provide a reconciliation worksheet.

Using Escrow | Escrow Reconciliation Worksheet

Click on Image for Enlarged View

Moving Funds Out of Escrow

Pay Out Cancellations

Keep in mind, when a reservation is taken and a deposit and subsequent payments are received, that money is kept in escrow until the guest checks out. However, if a reservation is cancelled, a rebooking is not possible, and money is retained by the property management company, these funds need to be moved out of escrow and into earned income manually.

To move money out of escrow and into earned income go to: Management > Pay Out Cancellations and follow these instructions.

  • Tick the box next to the reservation from which you want to transfer the funds.
  • Select a Payout Date at the bottom to record when the transfer was made.
  • Click “Post”

That is all there is to it. Now the funds are out of escrow and into the earned income account.

Using Escrow | Escrow Pay Out Cancellations

Click on Image for Enlarged View

Using Escrow | Escrow Pay Out Cancellations

Click on Image for Enlarged View

Using Escrow2024-04-10T15:50:41-04:00

Creating a Text Message Template

2024-05-09T17:05:14-04:00

Summary

Before getting started here, make sure that you have applied for, and been approved, for a texting campaign by The Campaign Registry. If you have not done this, contact our office to get the ball rolling. If you already have approval, you are in the right place to get started.

The text messaging feature in BrightSide uses predefined templates to communicate with guests, owners, housekeeping, and maintenance. In this article, we will show you how to set up a text message template to go out automatically at predetermined times. You may also manually send a text message from one of these templates.

NOTE: The text message templates in BrightSide are ALL connected to reservations. In other words, you cannot send a text to someone who does not have a reservation or is not associated with a reservation, like the owner or cleaner. These templates can be set up to go out automatically, or manually if you prefer.

Navigate to:  Setup > Edit Guest Letters > +Add Template (blue button)

Adding a Template

Select Template Type

The “Guest Letter Template” is used to create templates for both emails and texts. In this first step, select “Text” as the type of template you are creating. Most of the features work the same as for email, but when you choose “text,” the subject field disappears because it is not needed.

In the “Letter Name” field, give this template a name that is easily recognizable, and distinguishable, from other texts and emails.

HINT: Place a “T” in the name so you know it is a text in the dropdown menu. You may have an email with the same name, and this is helpful when you  need to send a message manually. Trust us! For example, name this text, “T Deposit Confirmation.” Guests don’t see the name, so name it so you know what it is.

Creating a Texting Template | Type & Name

Click on Image for Enlarged View

Content

The content for a text message needs to be short and sweet. As a general rule, use no more than 160 characters. This is the industry standard, and if it is longer, it may be broken into multiple texts, or even worse, go undelivered.

BrightSide recommends keeping it short, and using dynamic text to create personal messages.

Creating a Texting Template
Creating a Texting Template | Content

Click on Image for Enlarged View

Creating a Texting Template | Content

Click on Image for Enlarged View

Automatically Send

Now that you have content, you need to set the parameters for sending the text. There are two types of triggers that automatically send a text message:

  • When something happens.
    • Select from the following triggers: Reservation Taken, Deposit Confirmed, Checkin, Checkout, Reservation Cancelled, Reactivated, Balance Due, Balance Paid, or Documents Signed.

OR

  • On a schedule.
    • Select from the following triggers: On/Before/After: Booking Date, Arrival Date, Departure Date, Cancellation Date, Balance Due Date, or Rebooking Date. Select a time of day also.

HINT: Create unique text templates for each occasion that you want to send a text. For example, if you want to send a text when the reservation is taken, create a template for it. If you need to send another text at “Checkin” containing the entry codes, create another one. Remember, if you select both types of triggers, they will both send.

Creating a Texting Template | Automatically Send When Something Happens

Click on Image for Enlarged View

Creating a Texting Template | Automatically Send on a Schedule

Click on Image for Enlarged View

Add Conditions

BrightSide allows you to set conditions determining who receives a particular text. You may include guests in specific units or exclude guests in specific units. You can set up a text to only go out to specific reservation sources, like Airbnb, or Vrbo. There are a number of conditions from which you may select.

Creating a Texting Template | Adding Conditions

Click on Image for Enlarged View

Creating a Texting Template | Adding Conditions

Click on Image for Enlarged View

Recipient

Choose who is going to receive this text. Is it the guest, owner, cleaner, or someone else?

Creating a Texting Template | Choosing a Recipient

Click on Image for Enlarged View

Creating a Text Message Template2024-05-09T17:05:14-04:00

Creating an Email Message Template

2024-05-29T10:18:37-04:00

Summary

The email feature in BrightSide uses predefined templates to communicate with guests, owners, housekeeping, and maintenance. In this article, we will show you how to set up an email message template to go out automatically at predetermined times. You may also manually send an email message from one of these templates. Keep in mind, BrightSide sends messages out, but any incoming email will be routed to a separate email account outside of BrightSide.

NOTE: The email message templates in BrightSide are ALL connected to reservations. In other words, you cannot send an email to someone who does not have a reservation or is not associated with a reservation, like the owner or cleaner. These templates can be set up to go out automatically, or manually if you prefer.

Navigate to:  Setup > Edit Guest Letters > +Add Template (blue button)

Adding a Template

Select Template Type

The “Guest Letter Template” is used to create templates for three different types of communications: emails, texts, and OTA channel integrated messaging. In this example, we are using the “Email” option.

In this first step, select “Email” as the type of template you are creating. Most of the features work the same for email and texting. However, the “Channel” options work a little bit differently, which are explained in the Knowledge Base article, Creating a Channel Messaging Template.

In the “Letter Name” field, give this template a name that is easily recognizable, and distinguishable, from other texts and emails. You may also enter a subject in the Subject field.

NOTE: The “dynamic text short codes” may be copied and pasted into the subject field if you want to use them there.

Creating an Email Template | Type & Name

Click on Image for Enlarged View

Content

The content for an email message can be as short or long as you need it to be. As a general rule, people don’t read lengthy emails. Enter just what is necessary and nothing more. BrightSide recommends keeping it short, and using dynamic text to make your emails personal.

  • Dynamic Text: you can create a generic template that is easily personalized by inserting dynamic text into the body of the email. Place your cursor in the email where you want to insert the information, then click on the “Insert dynamic text” dropdown. You can choose from nearly 50 options, like guest name, unit name, check-in date, check-out date, and others.
Creating an Email Template | Dynamic Text

Click on Image for Enlarged View

Automatically Send

Now that you have content, you need to set the parameters for sending the email. There are two types of triggers that automatically send an email:

  • When something happens.
    • Select from the following triggers: Reservation Taken, Deposit Confirmed, Checkin, Checkout, Reservation Cancelled, Reactivated, Balance Due, Balance Paid, or Documents Signed.

OR

  • On a schedule.
    • Select from the following triggers: On/Before/After: Booking Date, Arrival Date, Departure Date, Cancellation Date, Balance Due Date, or Rebooking Date. Select a time of day also.

HINT: Create unique email templates for each occasion that you want to send an email. For example, if you want to send an email when the reservation is taken, create a template for it. If you need to send another email after “Checkin” containing the entry codes, create another one. Remember, if you select both types of triggers, they will both send.

Creating a Texting Template | Automatically Send When Something Happens

Click on Image for Enlarged View

Creating a Texting Template | Automatically Send on a Schedule

Click on Image for Enlarged View

Add Conditions

BrightSide allows you to set conditions determining who receives a particular email. You may include guests in specific units or exclude guests in specific units. You can set up an email to only go out only to specific reservation sources, like Airbnb, or Vrbo. There are a number of conditions from which you may select.

Creating an Email Template | Adding Conditions

Click on Image for Enlarged View

Creating an Email Template | Adding Conditions

Click on Image for Enlarged View

Recipient & Attachments

Choose who is going to receive this email. Is it the guest, owner, cleaner, or someone else? If this is an email, you may also choose to include an attachment. Be careful not to choose more than one or two attachments, filters could designate it as SPAM and fail to deliver it.

Creating an Email Template | Choosing a Recipient

Click on Image for Enlarged View

Creating an Email Message Template2024-05-29T10:18:37-04:00

Add Text Messaging to Account

2024-09-06T16:31:08-04:00

Summary

Text messaging plays a key role in how BrightSide users communicate with their guests. When people are on vacation, they do not check their email as frequently as they do when they are at home or working. Some surveys revealed that as many as 75% of people never check email while on vacation. However, most people rarely skip checking their text messages. If you want to communicate with your guests after they leave their house, you most likely need to do it via SMS, or text.

BrightSide offers text messaging to users who request it. It is not a feature that “works right out of the box.” Implementing our texting feature is a lengthy process that takes time to set up and use.

NOTE: We do not charge our users additional fees for texting, acquiring a phone number, or registering a campaign. However, we reserve the right to begin charging for these services if/when we determine it can no longer be offered for free.

The Process

Let Us Know

If you are a current BrightSide user, call or send us an email to let us know that you want to add texting to your account. This will set things in motion. Please keep reading to know what to expect. The process can take up to six weeks or more.

If you are a new client and will be onboarding, let the onboarding specialist know that you want to include texting. If we start early enough, you may have texting ready by the time you launch.

The Campaign Registry

In 2018, the FCC ruled that SMS and MMS are informational services giving mobile carriers the ability to regulate the sending and receiving of messages as they see fit. In 2021, wireless carriers classified businesses sending texts as A2P, or Application to Person. They also began requiring businesses to register their company, numbers, and campaigns, with The Campaign Registry. This entity is supported by the major carriers, with authority provided by the FCC, to regulate business texting. For more information, watch the video below provided by RingCentral.

Register a Number

You must have a phone number associated with your texting campaign. If you do not have one, BrightSide will acquire one for you. At the moment, we use Twilio, Nuso, or Flowroute, to process text messages.

Brand Registration

Your company is your brand. Wireless regulators require you to apply, and register your “brand” through The Campaign Registry. BrightSide is happy to walk you through this process, and even do it for you, if needed.

Campaign Registration

After your brand is registered and approved, you must then register a “campaign.” The campaign tells regulators how you plan to use text messaging to communicate with your customers. If you use texting for more than one purpose, you must register a separate campaign for each.

For example, management companies sending text messages to guests with information about their upcoming stay is one campaign. Sending messages long after they have completed their stay asking them to come back, is another campaign, and requires registration.

Text Message Templates

Create a Text Template

Your campaign was approved and now you are ready to begin setting up your text message templates. For detailed instructions, go to our Knowledge Base article, Creating a Text Message Template.

Add Text Messaging to Account2024-09-06T16:31:08-04:00

BrightSide Dashboard Overview

2024-04-10T16:03:39-04:00

Summary

In this brief Management Dashboard Overview, we will show you what to expect when you log in for the first time. We help you get acquainted with the main menu and the quick menu icons. For in-depth instructions, just follow the links provided for each topic.

  • Introduction to the Management Dashboard
  • Main Menu
  • Quick Menu Icons

As a property manager, the management dashboard is where everything happens. After logging in, you may create and manage reservations, manage properties, add contractors, assign maintenance tasks, schedule cleaning, run reports, and so much more. We will go into more detail with each of the submenu items in separate articles and videos. For now, let’s just get an overview of the management dashboard.

When you first log-in, you see a summary page that includes Deposits Due, Balances Due, Check-Ins, Check-Outs, etc. Each item links to the specific reservation to which it is associated. Clicking on the link allows you to view, edit, or take other actions on that reservation.

Main Menu

The management dashboard’s main menu includes the categories of Reservations, Properties, Maintenance, Cleaning, Marketing, Reports, Management, Setup, and Log Out (highlighted in red below). Each menu item drops down with a number of options from which to choose.

BrightSide Dashboard | Main Menu

Click on Image for Enlarged View

Icon Menu

In the upper right corner, there are six “quick view” icons (highlighted in red). These are shortcuts to the most used features: Dashboard, New Reservation, Unit Calendar, New Sale, Reservation Search, and Support.

BrightSide Dashboard | Icon Menu

Click Image for Enlarged View

Home Icon

The “Home” icon takes you to the Dashboard summary page. This is where you begin each time you log in. When you need to return to this page, just click the home icon.

The example provided below includes only Deposits Due and Balances Due. Your dashboard may show items such as Pending Check-Ins, Unconfirmed Cancellations, Documents/Contracts Not Received, and a number of other lists.

BrightSide Dashboard | Home Icon

Click Image for Enlarged View

Bed Icon

The “Bed” icon will take you to the “New Reservation” form. You may begin scheduling a reservation here. Just add the desired dates, the type of unit the guests want (i.e.: 1, 2, 3, or 4 bedrooms), and the features they are requesting. The system will pull up available units based on your criteria.

For more detailed information about this feature, and a video tutorial, go to “Create a New Reservation”.

BrightSide Dashboard | Bed Icon

Click Image for Enlarged View

Calendar Icon

The “Calendar” icon will take you to the Unit Calendar page. This page displays the calendar for units during a specific date range. You can see the names of the units on the left side of the calendar, the available dates with prices, and current reservations.

You may begin a reservation directly from the calendar by selecting available dates for a particular unit. You may filter results by ticking the amenities’ boxes above the calendar.

For more detailed information about this feature, and a video tutorial, go to “How to use the Unit Calendar”.

BrightSide Dashboard | Calendar Icon

Click Image for Enlarged View

Credit Card Icon

The “Credit Card” icon takes you to the “New Sale” form where you may record cash payments or process credit card payments. Some BrightSide clients use this feature to process payments for miscellaneous charges. This is optional and is available for the asking. It will not automatically show up in your dashboard.

For more detailed information about this feature, and a video tutorial, go to “How to use the New Sale form”.

BrightSide Dashboard | Credit Card Icon

Click Image for Enlarged View

Magnifying Glass Icon

The “Magnifying Glass” icon will take you to the “Reservation Search” form. You may search using the reservation number, reference number, guest’s name, email, phone, arrival/departure dates, and unit.

For more detailed information about this feature, and a video tutorial, go to “How to use the Search Reservations form”.

BrightSide Dashboard | Magnifying Glass Icon

Click Image for Enlarged View

Question Mark Icon

The “Question Mark” icon takes you directly to our “support request” form. When you encounter an issue with the software, or just need non-urgent help, click on the question mark and it will take you to our support request form (see the second image below). We respond quickly and it is an efficient and effective way to get the assistance you need.

For more detailed information about this feature, and a video tutorial, go to “How to Submit a Support Request”.

BrightSide Dashboard | Question Mark Icon

Click Image for Enlarged View

BrightSide Dashboard | Support Request

Click Image for Enlarged View

BrightSide Dashboard Overview2024-04-10T16:03:39-04:00

Company Setup

2024-04-10T16:05:30-04:00

Summary

In this tutorial you will learn how to set up your company information in BrightSide. This needs to be the first thing you do in order to get started using BrightSide.

  • Enter your company name, address, phone, and email address
  • Enter your Tax ID
  • Add your website address
  • Select your time zone
  • Upload your company logo

Setting Up Your Company

Setting up your company information in BrightSide is fairly straightforward. Be sure to include as much information as possible. Other areas of BrightSide will use the information you insert here.

Navigate to: Setup > Company

Company Setup in BrightSide

Click on Image for Enlarged View

The company information input here is used for outgoing emails and other purposes. Please complete as much of this as possible.

  • Name: enter the legal name for your company.
  • Address: enter the complete address for your company.
  • Phone: enter the phone number for your company.
  • Email: enter the email address for your company. This email address is used for the “reply” address when sending out emails. Be sure it is an address that someone in your office monitors regularly.
  • Website: enter the URL of your website beginning with https://
  • Tax ID: this is usually your federal employer identification number (FEIN) in the following format – 12-3456789.
  • Time Zone: enter the time zone where your office is located.
  • Logo: upload your company logo. Best size is 280 x 80 and format is either PNG, JPF, or GIF

Company Setup2024-04-10T16:05:30-04:00
Go to Top